Create custom designs that sell
Ready to create stunning images without needing advanced art skills? Whether you’re aiming for surreal artwork, detailed illustrations, or cinematic-style designs, Midjourney is one of the best AI image generators to transform your text into vivid visuals.
Let’s explore how to use Midjourney V6, from creating a Discord account to the basics of prompting. Read on and start generating images with AI today!
This post may contain affiliate links, which means we may earn a commission if you make a purchase through those links. This comes at no additional cost to you.
Key takeaways
- Midjourney V6 allows for more precise and coherent image generation with features like personalization codes and character references.
- Writing detailed prompts is essential for better results. Modifiers like –style raw or –stylize help refine the output.
- Upscaling modes and variation options provide flexibility to refine resolution and style or explore different versions of an image.
- With Printify, AI art can be easily monetized by turning designs into products like t-shirts or mugs and selling them on eCommerce platforms.
- The Midjourney AI image generator is versatile and can be used for personal projects or commercial products, making it accessible for many creative needs.
Create a Discord account
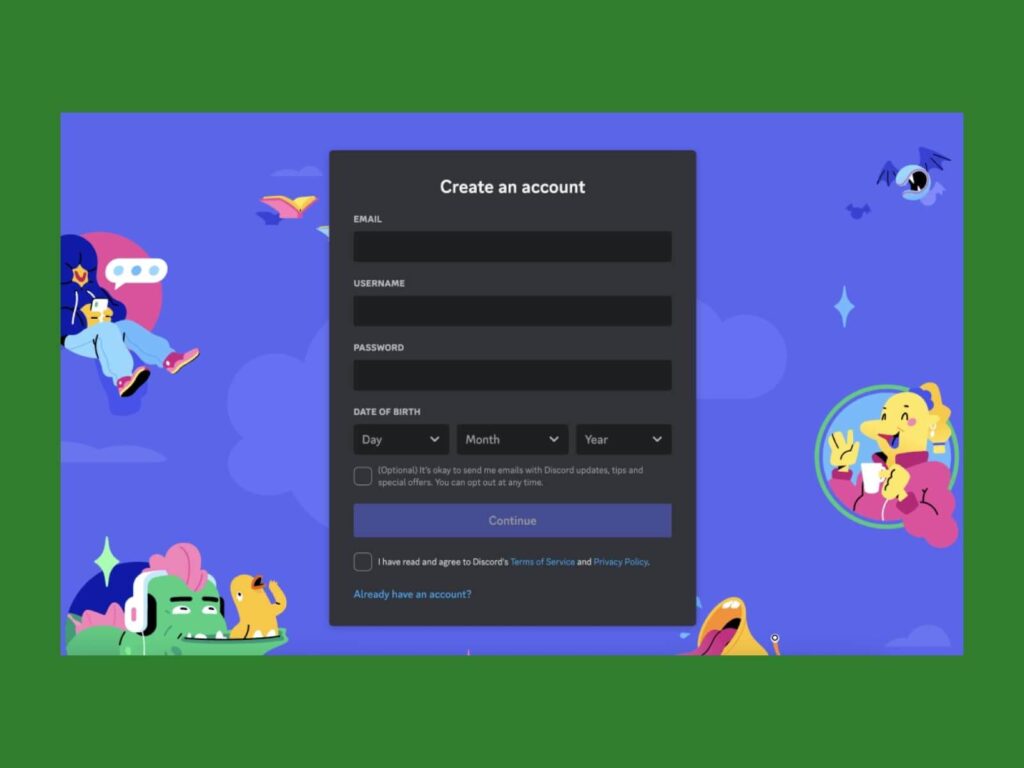
The first step in using the Midjourney bot is creating a Discord account. Discord is a chat app that lets users communicate via text, voice, or video and join servers – communities built around shared interests or hobbies.
- Visit the Discord website and click Open Discord in your browser.
- Enter your username, email address, and password, then click Continue.
- Verify your email address by clicking on the link sent to your inbox.
- Pick a profile picture and customize your settings.
- Choose a Midjourney subscription:
The Basic plan costs $10 monthly ($8 if paid yearly) and includes 3.3 hours of Fast GPU time.
The Standard Midjourney Plan costs $30 monthly ($24 if paid yearly) and gives additional Fast GPU hours plus unlimited Relaxed mode image generations. For more advanced features, the Pro Plan offers stealth mode and additional Fast GPU hours for $60 per month ($48 if paid annually), while the Mega Plan, at $120 per month ($96 if paid annually), provides the highest number of Fast GPU hours plus stealth mode.
Go to a #newbie or #general channel, or create a new one
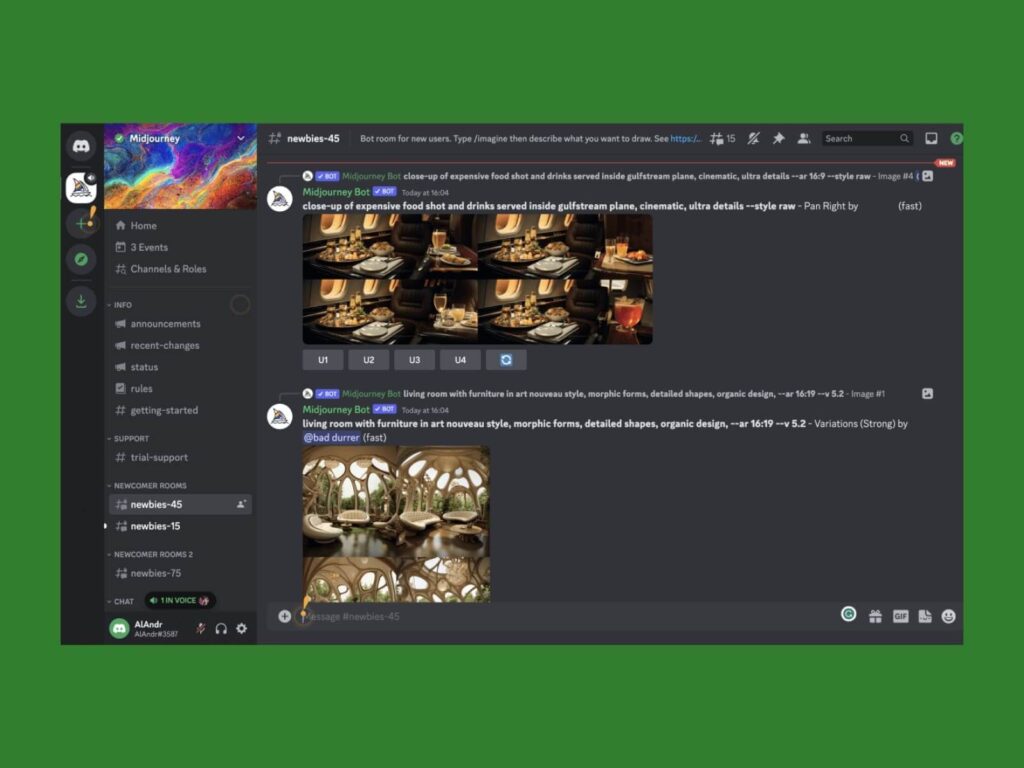
Join the Midjourney server via your Discord account. A server is a group of channels where you can chat with bots and other users. A channel is a specific topic or category within a server.
- To join the official Discord server, go to midjourney.com and click Join Discord.
- Accept the invitation to join the Midjourney server. A welcome message will appear from the Midjourney bot.
- Read and agree to the rules and terms of service.
- You’re now in the Midjourney server, where you’ll see all the bot channels on the left sidebar.
You need to enter a channel to send commands to a bot. There are two types of channels: #Newbie and its newcomer room variants (like #Newbies-67 or #Newbies-7), and #General:
| Who’s it for? | User limit | Cooldown between commands | Bot behavior | |
|---|---|---|---|---|
| #Newbie | New users wanting to learn how to use Midjourney | Ten users | 30 seconds | Provides helpful tips |
| #General | Experienced users | No limit | No cooldown | Gives advanced features |
Click on any #General or #Newbie channel to join, or create your own by selecting the plus icon next to the channel category. Name it as you like and invite others to join.
Enter other Midjourney or AI art-related servers by clicking the explore public servers button on Discord’s left sidebar.
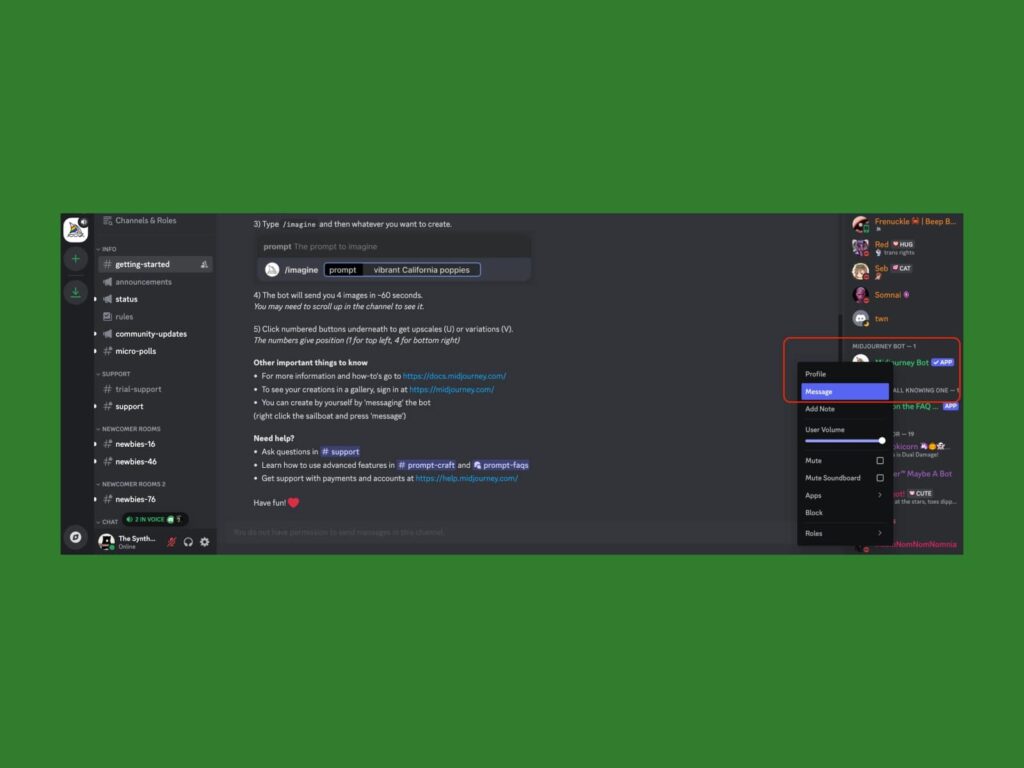
Now that you’re in a channel, start prompting by sending a direct message to the Midjourney Bot. To find it, check the channel users’ list on the right side – the bot will be listed there like any other user. Right-click on it and select Message to start interacting with the Midjourney bot.
Use the /imagine command
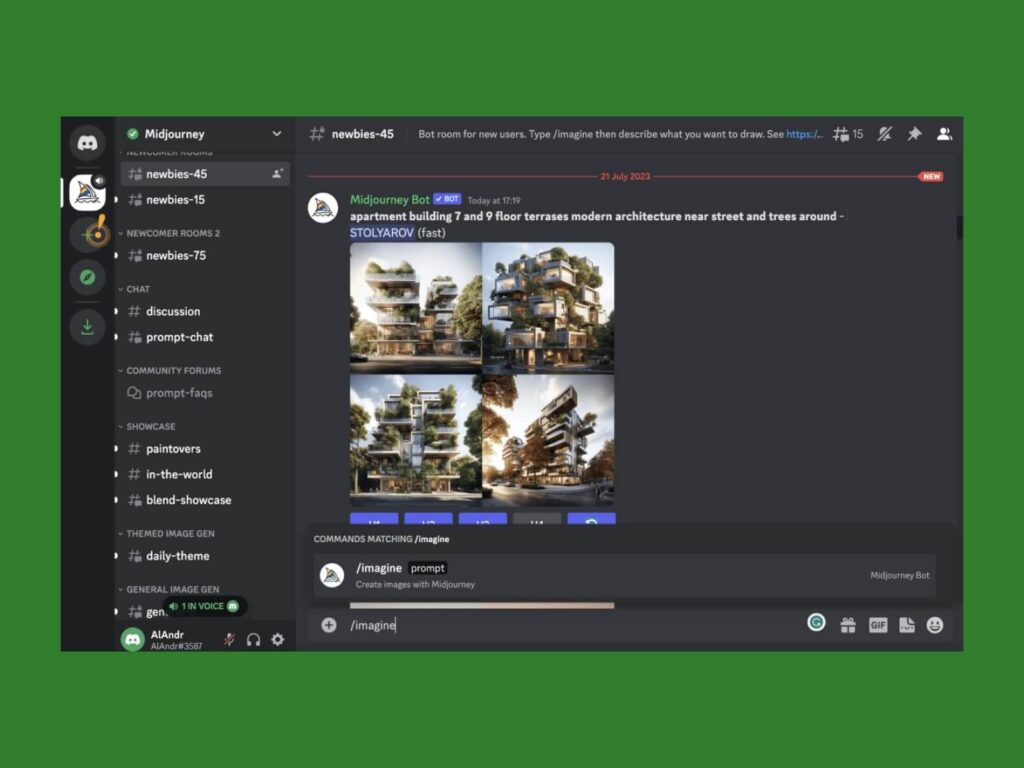
Once you’re in a chat with the Midjourney bot, start generating images using the /imagine command. Simply enter a text prompt describing what you’d like the image to look like, using natural language, keywords, or a mix of both.
In Midjourney V6, you can use much longer and more detailed prompts (up to 1,985 characters). The new mode better understands complex instructions, so add as much detail as needed.
Use modifiers to adjust the style, mood, color, size, shape, or perspective of your image. For example: -cartoonish, -dark, -red, -giant, -round, or -top view.
Pro tip
Midjourney V6 excels at producing realistic results. For hyper-realism, use the new –style raw parameter. Avoid redundant modifiers like “4K” or “photorealistic,” which were beneficial in earlier versions but are now unnecessary.
- Write the /imagine command in the prompt field (chat box) and only then write or paste your prompt – if you don’t type the command first, the bot won’t activate.
- Click Enter and wait while the Midjourney bot interprets the text prompt and starts generating. Your first images will pop up in the chat with some buttons below it.
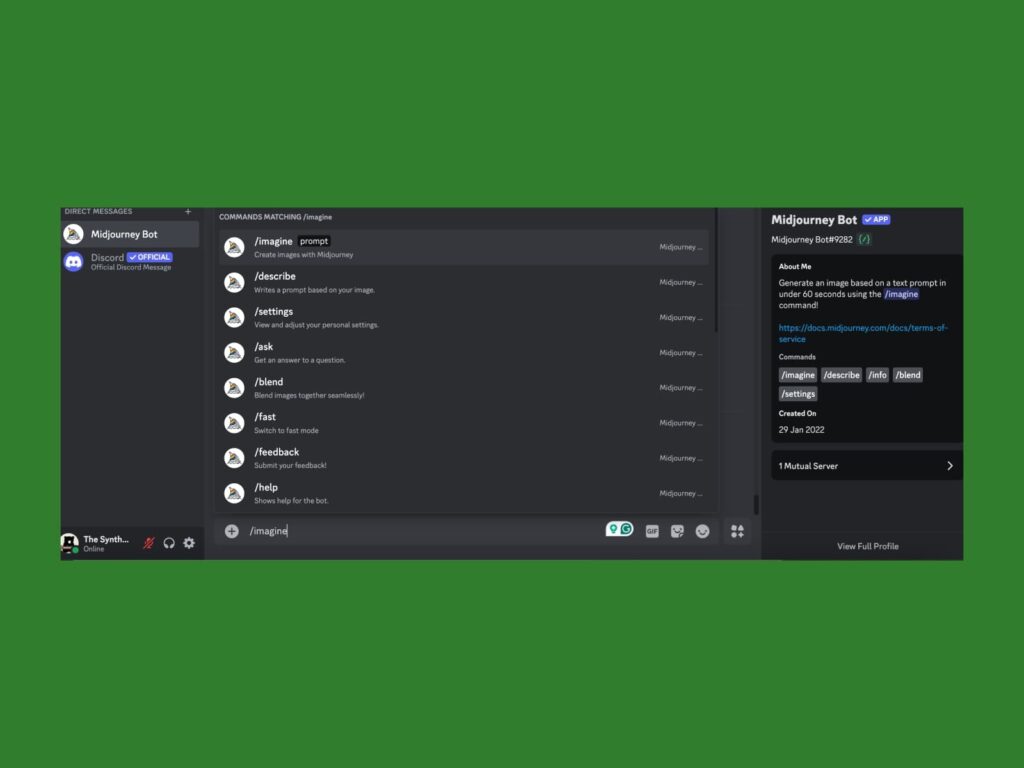
- You can also use the slash commands pop-up to see all the available commands and options for Midjourney.
Tip
Forgot what you wrote? See your original image prompt by hovering over it or by clicking the info icon under the generated images.
Make it happen today!
Let Midjourney work
Once you’ve sent your prompt, the artificial intelligence will start generating a new image. The Midjourney bot takes about a minute or more, depending on the complexity of the prompt and the server load.
Remember
Your chat with the Midjourney bot is public, and your images are displayed in the member’s gallery by default. The messages you see on screen aren’t private; everyone can read your original prompt. However, subscribed Midjourney users with a Pro plan can generate private images in stealth mode by typing the command </private >.
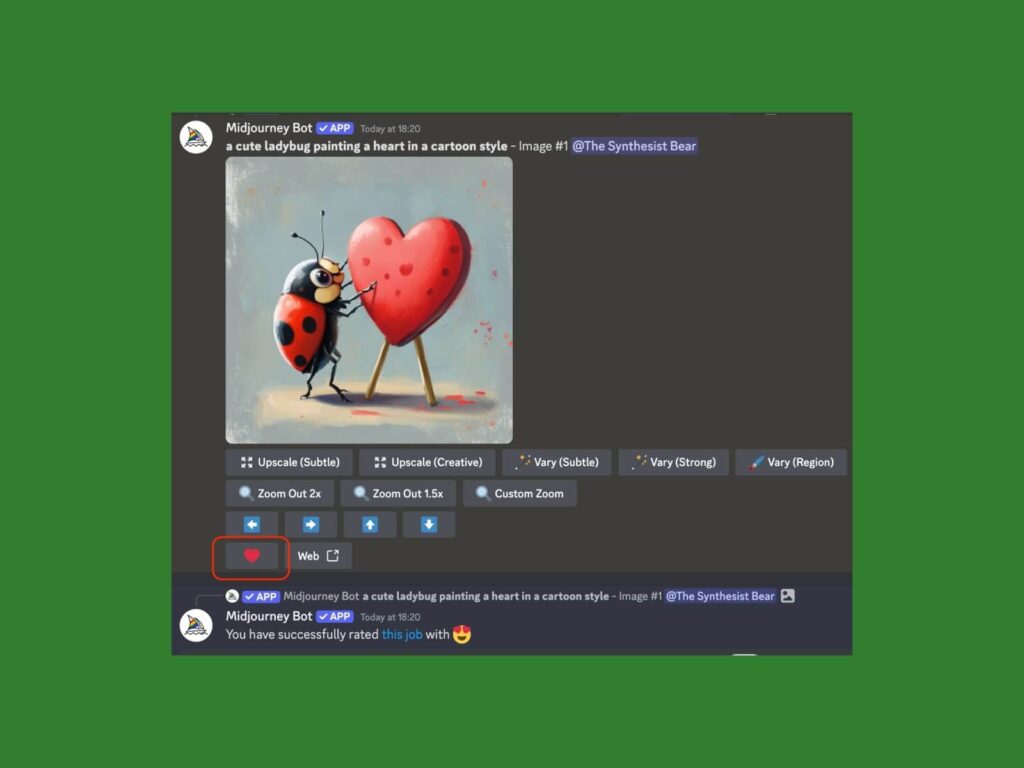
After Midjourney has generated the images, the final result will appear in the chat along with options to upscale, vary, or save the results.
Upscale images or create variations
In Midjourney V6, the upscaling process offers two modes: Subtle and Creative.
- Subtle Upscale: Doubles the size of your image (to 2048 x 2048 pixels) while preserving the original details. This is best for high-resolution images where maintaining realism is important.
- Creative Upscale: Also doubles the image size but introduces artistic enhancements, making the image more stylized. This mode is useful when you want to add more creative flair to your design.
To use these options, generate your image grid and click one of the U buttons (U1, U2, U3, U4) to upscale the chosen image. Depending on your goal, select either Subtle or Creative. If you’re aiming for detailed sharpness, choose Subtle; for artistic interpretations, opt for Creative.
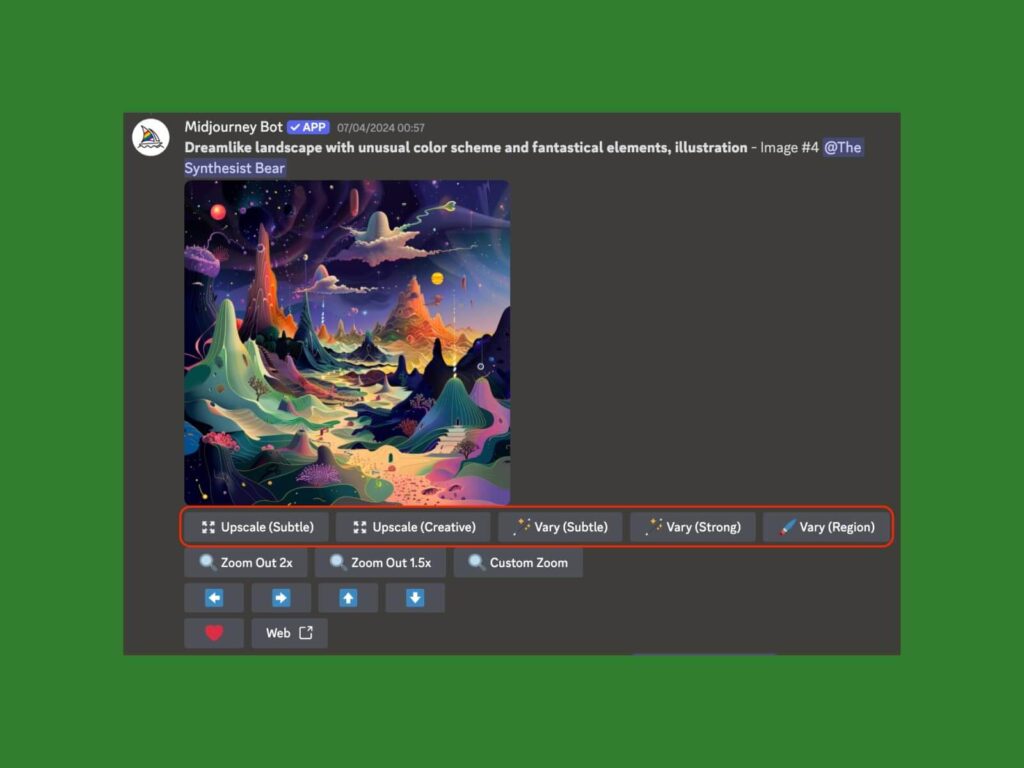
If you want to generate variations of an image, use the V buttons (V1, V2, V3, V4) under each grid image or use the Vary (Subtle) and Vary (Strong) options after upscaling.
Vary (Subtle) offers minor tweaks to the image, while Vary (Strong) makes more noticeable changes. By default, Midjourney operates in High Variation Mode, which introduces more dramatic changes, but you can switch to Low Variation Mode for subtler adjustments by using the /prefer variability command.
Make more variations or favorite an image
If you want to create additional variations of your image, Midjourney V6 features the Remix option. This allows you to modify the prompt before generating variations, giving you greater control over the final output. For example, add elements like “with brighter colors,” and the Remix tool will seamlessly incorporate these changes into the new variations.
For localized edits, try the Vary Region tool after upscaling, which allows you to select specific parts of the image and regenerate them without changing the entire artwork.
These tools let you fine-tune the resolution, style, and details of your AI-generated images.To save your favorite generations, click the heart reaction below the generated images.
Generating text in images
Midjourney V6 now lets you generate text within images using quotation marks in your prompts. Although it’s not perfect yet, it’s a huge improvement over previous versions, where text was often distorted.
For example:
“/imagine an old manuscript with the text “‘Midjourney documentation” written in bold across the center and engineering drawings in the style of Leonardo da Vinci sketches.”
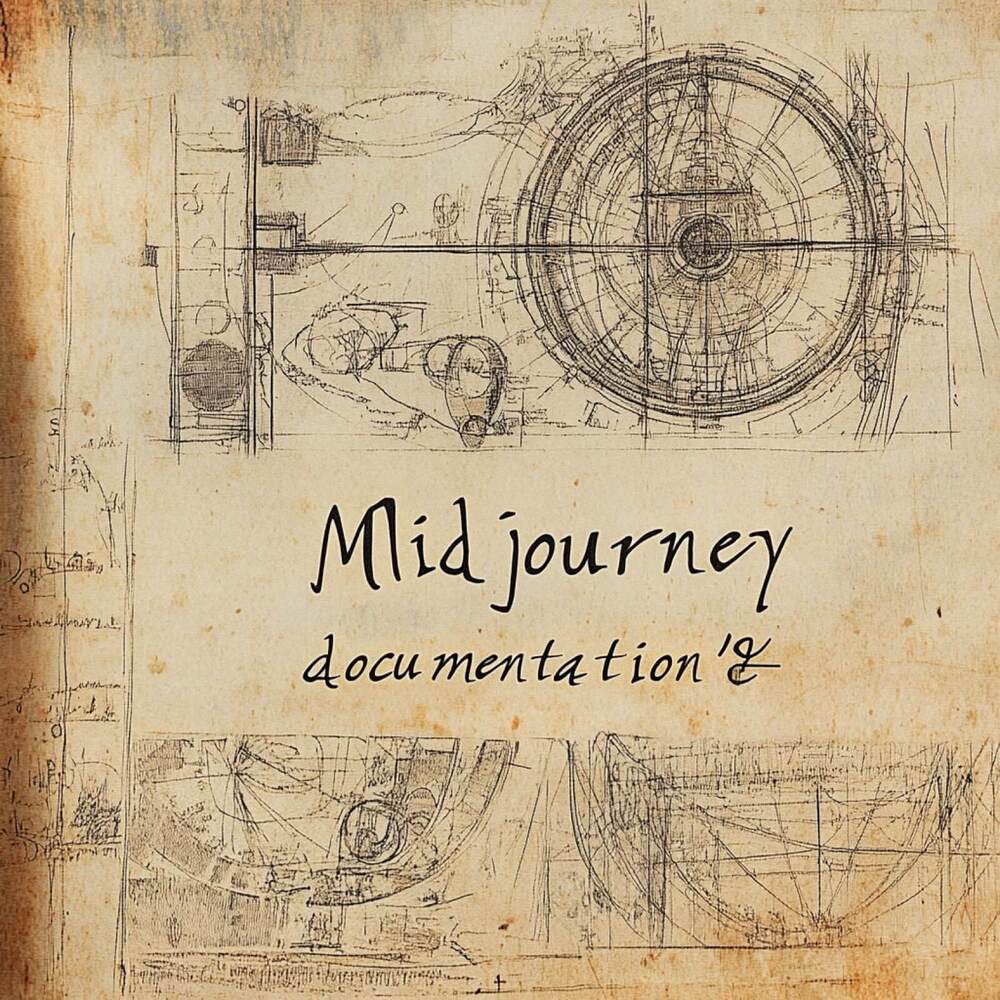
This feature is suitable for creating posters, banners, or product labels.
Time to save and share your work
Midjourney V6 includes a personalization feature that lets you save your images and keep track of your preferences, which can be reused later.
When you generate an image using the personalization feature, Midjourney assigns a unique personalization code to the image. Reuse this code in future prompts to ensure your new images follow the same style and aesthetic. You can even share this code with others to allow them to generate images using your personalized style.
Here’s how to save and share your images:
- Save your image:
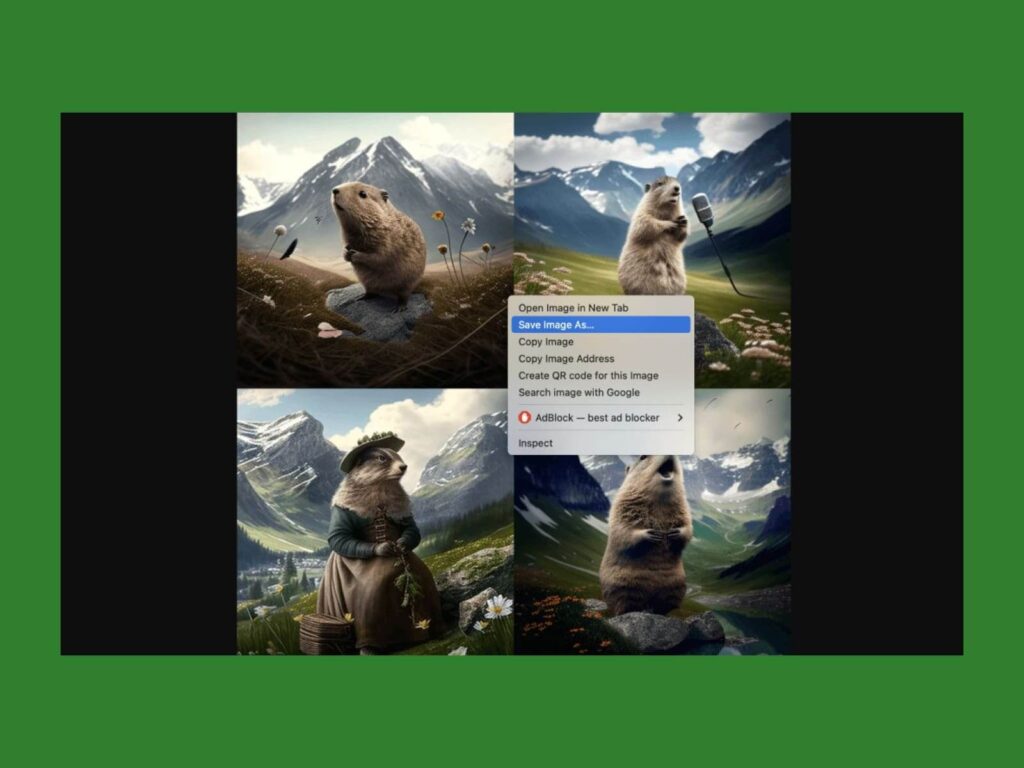
- Click on the image in the chat with the Midjourney bot, then open it in your browser by selecting Open in Browser.
- Right-click the image and select Save Image As…, then choose where to save it on your device.
- Share your image:
- Click the share icon below the selected image in the chat. Either copy the link to the image or download it to share with others.
By using the personalization feature, you can create a consistent style across all your images, and the stylize parameter (–s) lets you control how much personalization is applied, ranging from subtle effects to stronger stylistic influences.
Created great AI images? Sell them with Printify
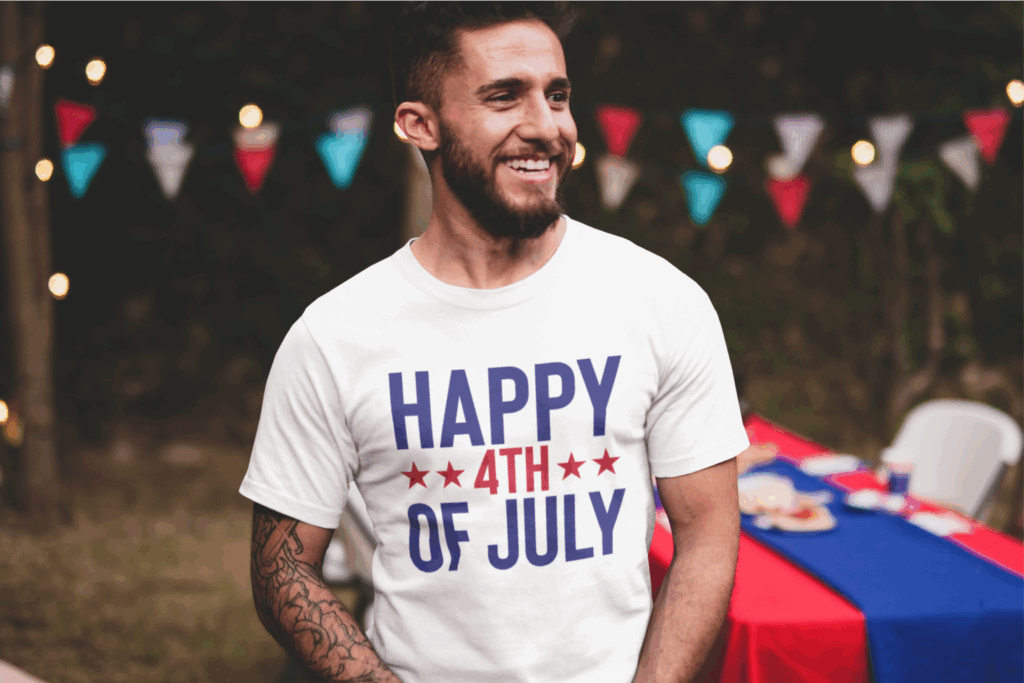
Midjourney V6’s realism, enhanced texture quality, and new text capabilities make it perfect for creating high-quality, printable designs for products like t-shirts, mugs, and posters.
Sign up for a free Printify account
Visit Printify’s website and sign up for a free account. With no upfront costs or inventory required, you can start right away.
Choose a product to customize
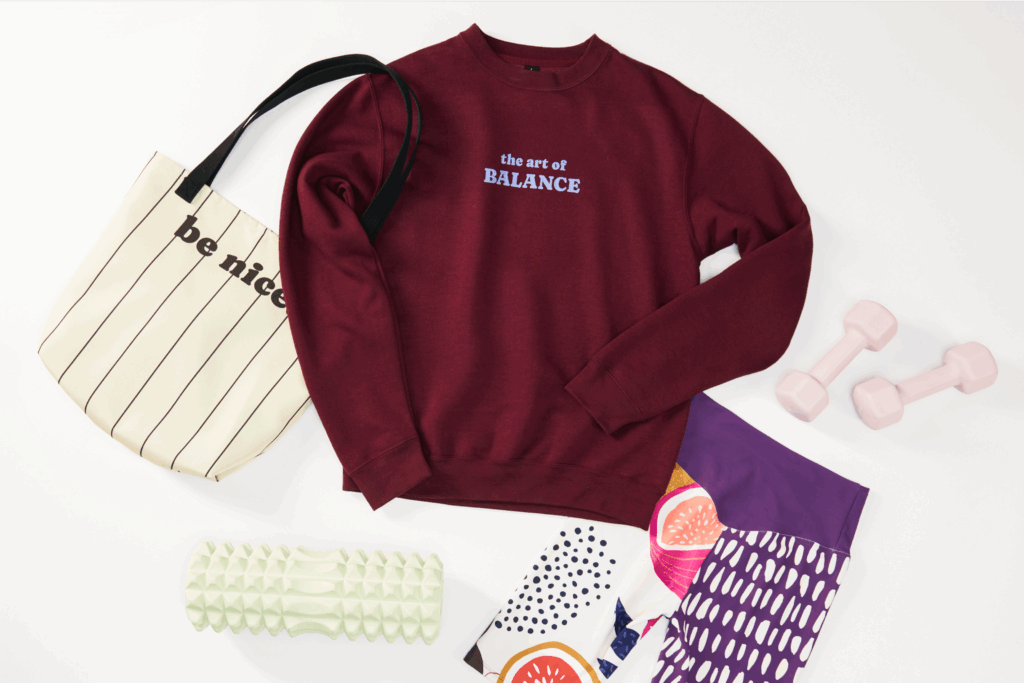
Select from over 1,000 high-quality products, including t-shirts, mugs, posters, phone cases, and more. Whether your art looks best on apparel, home decor, or accessories, Printify has you covered.
Upload your Midjourney-generated designs
Use our beginner-friendly Product Creator to upload your Midjourney images. The enhanced realism and texture quality make your designs pop on any product. Place the image on your chosen product and see how it will look in real-time.
Set your prices and connect your store
Once your designs are ready, set competitive prices and connect your Printify account to popular eCommerce platforms like Shopify, Etsy, WooCommerce, eBay, Wix, and Squarespace. This allows you to easily manage your products, orders, and customers all in one place.
Start selling and let Printify handle the rest
Printify’s network handles printing, packaging, and shipping your products directly to your customers. All you have to do is promote your store and start earning!
Make it happen today!
Master Midjourney prompts
Once you’re familiar with using Midjourney, explore how to craft effective prompts. The way you phrase your prompts directly impacts the quality of the images generated, and with Midjourney V6, precision is more important than ever. Here’s how to elevate your prompt-writing skills:
1. Be specific and descriptive
Midjourney V6 responds best to detailed descriptions. The more specific you are, the closer the result will align with your vision. For example, instead of “a dog in a field,” try “a golden retriever running in a vibrant green field with wildflowers.” By adding details about color, action, or environment, you’ll generate richer, more accurate images.
2. Use modifiers for style and detail
Enhance your prompts with modifiers to refine the style, color, mood, or aspect ratio of your image. For example:
- –style raw: Use this for more realistic, detailed images.
- –stylize: Adjust how artistic the output is (default is 100, but you can increase it to up to 1,000 for more abstract art). Modifiers like “cinematic,” “vintage,” or “minimalist” can also help convey a specific style.
3. Leverage character references and new V6 features
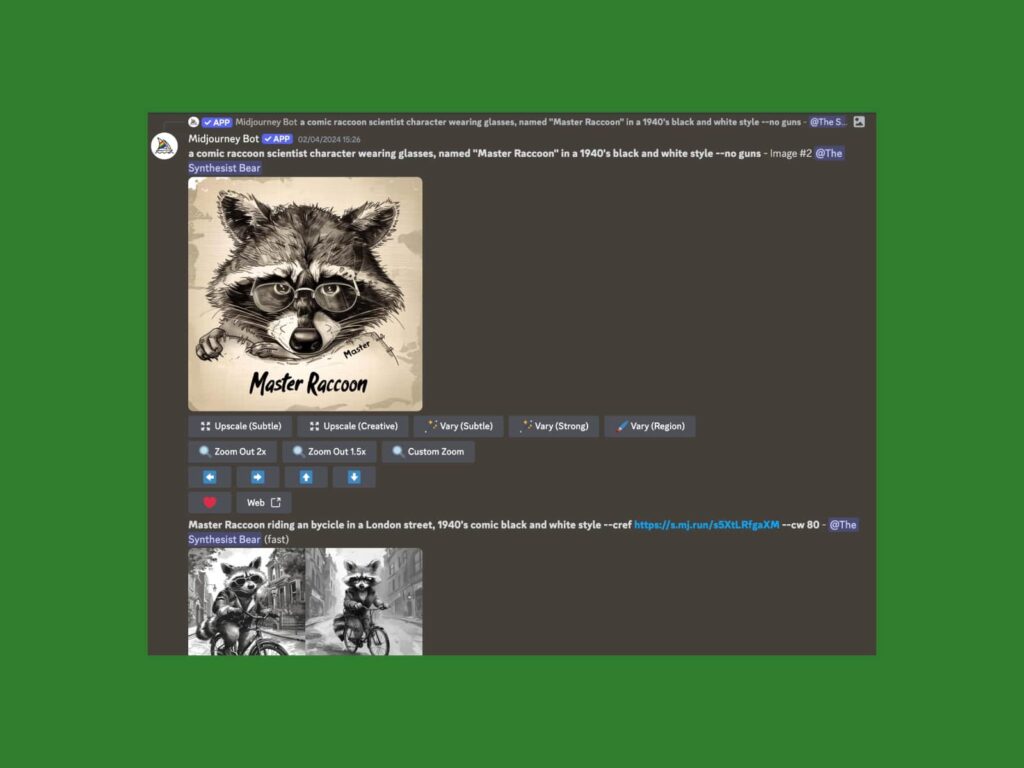
Midjourney V6 introduces character references, allowing you to provide image references alongside your text to guide the generation process. This feature helps maintain consistent character traits and style across multiple prompts, ensuring specific design elements are replicated effectively.
4. Experiment with prompts using symbols and keywords
In addition to natural language, try using symbols and keywords like :: to separate different ideas or elements within a prompt. This helps the AI prioritize and balance multiple aspects of the image you want to create.
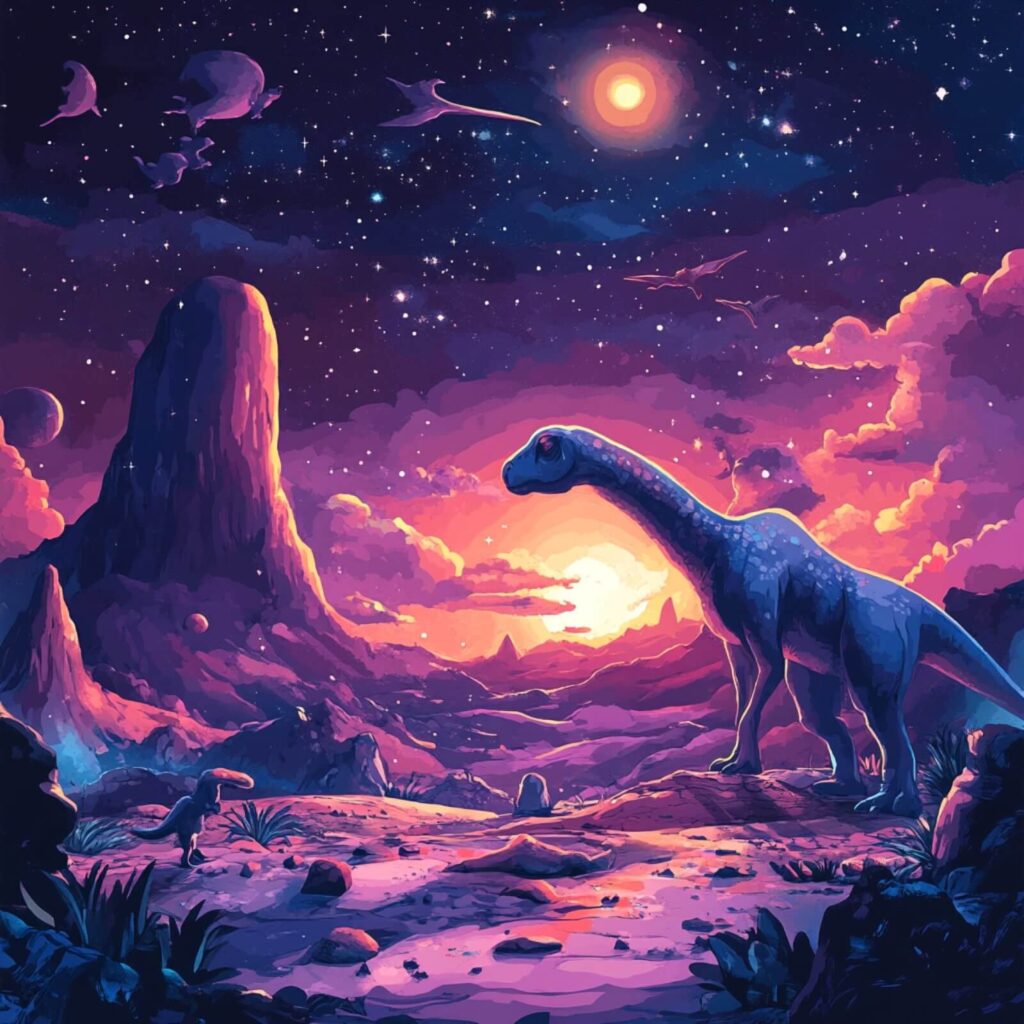
Example:
/imagine dinosaurs walking on a moon-like surface :: galaxies and stars in the background :: cartoon style
5. Learn more with in-depth examples
For a complete guide on mastering prompts with Midjourney V6, including new features and advanced tips, check out our in-depth blog post on Midjourney prompts. It provides practical examples and strategies to help you write precise prompts that consistently produce high-quality images.
Midjourney FAQs
Join the official Midjourney Discord channel and use the /imagine command with a detailed prompt to generate images. In V6, it’s important to be specific, as the model better understands complex instructions.
Adjust parameters like –stylize for artistic control, and use the remix function to tweak your results. The platform currently runs via a Midjourney Discord server, with a web version expected to launch soon.
Midjourney no longer offers a free tier. A Midjourney subscription starts at $10 per month (Basic) for 3.3 hours of Fast GPU time, with higher tiers like the $30 Standard plan offering more GPU hours and unlimited Relaxed mode generations. Check out Midjourney’s Subscription page.
For now, the generative AI only works through the Midjourney Discord bot. However, a web version is being developed for paid users, which will allow access through the Midjourney website.
Upload your own images to Discord, copy the reference image link, and include it in your prompt using /imagine <image link>. Adjust the image’s influence using the image weight parameter, which is helpful for blending photos or remixing art. You can also use these images as “Style reference.”
Be clear and specific. Write detailed text prompts, but avoid unnecessary words (like “4K” or “photorealistic,” as Midjourney V6 already incorporates that), and focus on the text description. Use parameters like –style raw for realism or –stylize for more artistic results. Commands like remix help refine outputs further.
In conclusion
Midjourney V6 gives you the power to create incredible AI-generated art with ease, whether you’re designing for fun or profit. By mastering prompts and using advanced features like upscaling, personalization, and variations, you can produce high-quality images tailored to your needs.
Paired with Printify’s print-on-demand service, you can quickly turn your AI creations into real products. Start experimenting and bring your creative ideas to life today!
