Bring your design ideas to life
Whether you’re a professional artist, an experienced entrepreneur, or a beginner in both, our graphic design tips will help you to create your first design.
As eCommerce continues to grow and the number of digital buyers rises, print-on-demand (POD) offers a life-changing opportunity to anyone willing to seize it. If you’re wondering how to succeed in the POD industry with no design skills, this article is for you.
If you already have a design and just want to learn how to create your first product in our Product Creator (formerly known as Mockup Generator), our brief tutorial explains precisely that. In less than four minutes, you’ll learn how to upload, edit, make variations of your design, and much more.
However, if you have no designs on hand, read on as we will take a look at various graphic design tips, tools, freelancing sites, and other useful resources to assist you with your first design.
Armed with this knowledge, you’ll be able to jump-start your creative process and produce designs that generate sales and set you apart from the competition.
Step 1: Understand your customer
Understanding and defining your target audience is essential. After all, customers are the foundation of any print-on-demand businesses’ success. Before you begin with our graphic design tips, turn your focus to your potential customers.
To create a profitable and winning design, ask yourself the following questions:
- Who are my potential customers?
- What are they interested in?
- How large is the target market?
You can organize your customers into different groups based on things they have in common – age, gender, marital status, etc. This will help to identify their interests, main traits, and unique needs.
Always strive to make a connection with your customers. Pick or create designs that inspire emotion. Make sure it is something they’d be proud to wear in public.
Simply put, follow trends and give your customers what they want – designs that speak to them. If your customers love your designs, they will identify with your brand, and that’s a very good start.
Step 2: Think up design ideas

You don’t have to be a seasoned designer to come up with awesome designs for your POD business. Anyone can do it – the whole internet is at your fingertips. It is full of graphic design tips, tricks, and advice.
If you don’t know where to draw inspiration, you can use sites such as these:
However, if you’ve figured out who your target audience is, you can pick a niche. Armed with this knowledge, you can find more specific inspiration. A eureka moment won’t be far off.
What is a niche? In short, it’s a specific area of the market which has its own particular requirements, customers, and products. By successfully picking a niche, you are able to stand out from the crowd and have less competition.
A niche can be anything – crossfit, camping, sleepy cats, true crime, etc.
You can also find new ideas on Etsy, Amazon, and other online marketplaces and eCommerce platforms. You can easily add additional elements and make your print-on-demand design better.
Please keep in mind that you should only use your research as a starting point to create your own original work. Never fully copy a design you find somewhere or claim the work as your own.
Step 3: Learn tips & tricks of graphic design
When it comes to designing, there are a few things you should consider. If you’ve ever wanted to design your own t-shirts, hoodies, or any other branded merchandise, these are some great graphic design tips for beginners and non-designers.
Define your purpose
To get the most out of your POD design, be it profit or impact, you need to think about why you’re doing it in the first place.
If you want to start a print-on-demand business, you need designs that are eye-catching, pique curiosity, and align with your customers’ interests.
Consistency is key. If you already have an established brand, your designs should align with your current visual aesthetics, values, and personality.
Choose your colors
Colors are important – unconscious or otherwise, color can evoke emotions and inspire reactions. All advertisers know this. Google color psychology and you’ll find a wealth of interesting and useful information.
Although it may be tempting to add a lot of colors, this can backfire. You should try to achieve your design goals in the least amount of colors possible to avoid colors clashing that can make your designs unappealing. Two to three is a good amount.
If you already have a brand, your chosen colors should reflect your brand’s values and speak to your target audience.
Pick your fonts
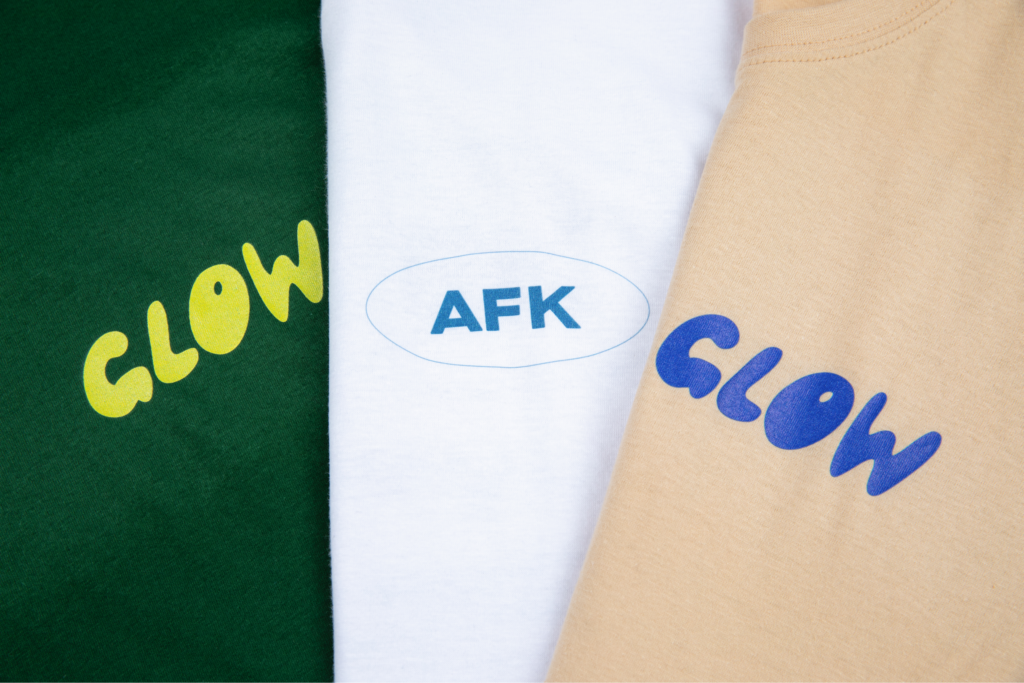
The right font can make a big difference – whatever text your design has, it should be easily readable and visually appealing. If the font isn’t legible and people have to strain their eyes to read it, it’s no good.
When it comes to designs, typography is equally important. Basically, it’s the art of arranging letters in a way that makes sense. The text should be clear and look aesthetically pleasing.
Ask yourself:
- Is the font readable?
- Is it trendy?
- What fonts are others using?
Your font choice can convey certain ideas and evoke emotions – we attribute certain characteristics to certain fonts. However, don’t go overboard, using two different fonts is usually enough.
Scale your fonts
Your fonts, compositional features, or shapes may require a bit of scaling. By scaling these elements, you can make your design more dynamic, add additional emphasis, and give it a bit of visual order.
You can use colors to enhance this technique, but make sure that the typeface looks good when increased in size.
Pick your graphics
If you want something more interesting than a text-based design, incorporating graphics into your design is a great way to go about it.
You can keep it simple and let your brand speak for itself, as we often see with companies like Nike, Calvin Klein, or Adidas.
If you want to experiment with illustrations or other visual graphics, you can add illustrations, geometric shapes, and wild colors.
Adding visuals is a great way to make your designs more playful, fun, and effective. Additionally, visuals are processed 60,000 times faster than text. Your visual design can leave a lasting impression far more quickly than text alone.
Align objects properly
If you want your design to look structured, presentable, and harmonious, pay attention to alignment. Despite its importance, it’s often overlooked.
Your design may have elements that are different shapes and sizes, which won’t look good unless aligned properly.
If done right, nobody will notice. However, if done incorrectly, everyone will be able to tell that something is not right.
Mockup your design
This is the part where you’ll preview how your design will look on your product. Usually, it’s the last step in the designing process. Always follow your print-on-demand provider’s design requirements.
Before finalizing your design, ask yourself:
- Is the spacing between design elements even?
- Is the layout balanced and visually appealing?
- How does the overall composition work together?
Never be afraid to ask for feedback from your friends or family. This can make or break your final product.
With our Product Creator, you can easily create realistic mockups of your custom product and see how they’ll look once printed. You can use these mockups for your online storefront. We’ll introduce you to this simple yet powerful tool further in our article.
Although there are plenty of other graphic design tips, if you take these into consideration, you’re off to a good start.
Make it happen today!
Step 4: Find a graphic design tool
While making your own designs from scratch can be a bit challenging, there are a variety of tools that can ease this process immensely. It is not as expensive or stressful as it may seem at first.
Images for printed products can be created in any graphic design software. Let’s take a look at some of the options.
Canva
Canva is a browser-based graphic design platform and tool.
It is easy to use and enables you to design anything from logos and social media graphics to posters, t-shirts, and other visual content. Canva is a useful tool for creating POD designs.
The free version has minimal features, while the paid version allows you to download images with a transparent background, has a background remover, additional templates, and so on.
Pixlr
Pixlr is a free, browser-based photo editing tool.
It is easy to use and has modern editing capabilities. If your print-on-demand designs need only a few touch-ups, it’s a great tool.
Pixlr can help with social media designs, web posters, and even t-shirt designs.
GIMP
GIMP is a free and open-source graphics editor.
It is used for image editing and manipulation, free-form drawing, and more. Although it’s not as intuitive as previous tools, it’s not difficult either.
You can find educational resources that show you the basics of making designs for print on demand.
Adobe Photoshop
Photoshop is a graphics editor that’s considered a gold standard in photo editing software.
It is used to edit photos and create original graphics. Although learning the basics of photoshop isn’t hard, it might seem confusing at first and requires a lot of focus.
However, it’s not free and comes with a steep learning curve. It is a more suitable option for advanced designers. If it’s something you’re interested in, Adobe offers free tutorials.
This isn’t by any means a comprehensive list, but it should give you an insight into what options you have.
Step 5: Explore additional resources
To further supercharge your creative process and add a little extra to your print-on-demand designs, you can find websites that offer various design resources as well as ready-made designs.
Before you dig in, however, make sure to always read their licensing agreement.
Let’s look at some of your options.
Printify’s free designs
All of our designs are 100% free and print-ready.
These designs can be used on products immediately – they are under Creative Commons license with commercial use. If you like, you can modify them to suit your needs.
They’re perfect for your custom print-on-demand products and can be directly uploaded on your merchandise.
Shutterstock integration
This integration provides you with near-unlimited and high-quality print file options.
With Shutterstock integration, you can create your first design with no effort at all.
In short, it allows you to use and customize images provided by Shutterstock, which can be published to your preferred sales channel at no up-front cost to you.
Whenever you sell a product containing a design from Shutterstock, the Printify product cost will contain a small fee, which will go to Shutterstock.
Create your own merchandise today!
Create designs by using design elements
If you simply want some additional resources that you can combine yourself, various design and font bundles might be the right choice for your project.
A word to the wise – always make sure to read their licensing agreement.
Design bundles
This site is a digital design marketplace, which offers high-quality premium and free design resources.
It has a bit of everything – textures, backgrounds, templates, icons, illustrations, and so on.
Font bundles
A marketplace for premium and free fonts.
It offers a variety of font bundles – from script to serif to monospace.
Although there are plenty of other resources out there, these sites offer a wide selection of designs, fonts, and exclusive deals.
Consider hiring a freelancer
If you have a special design in mind, but don’t really have the skills nor the patience to do it yourself, hire a freelancer.
Before you start scouting for talent you should start with properly identifying your needs and listing the design ideas you already have.
Based on this, you should be able to identify the essential design skills the ideal freelancer would have. Always make sure to communicate the project specifications clearly.
Here are some freelancing sites you can use:
- Fiverr. A popular freelancing site that allows you to hire a freelancer for your print-on-demand designs. It is an affordable option, but you must carefully review the offers and choose the one that meets your demands and quality expectations.
- 99designs. An online marketplace for graphic design services. It connects independent freelancers with clients in need of creative work. A good option for print-on-demand businesses, because it has a whole category dedicated to Clothing & Merchandise.
- Upwork. The biggest freelance marketplace in the United States. You can find outstanding talent, but it will require diligent research and portfolio browsing. You should always test the freelancer with a smaller project to check their skills.
However, freelancing sites aren’t your only option. You can reach out to your local community, ask around in your inner circle of friends, and on relevant forums and groups online.
You may find that hiring a freelancer based on personal recommendations is the quickest and easiest way to go about it.
If you’re interested in hiring a freelancer, our in-depth article will provide you with valuable insights. It is a handy guide that will help you to navigate the market and find the talent you need.
Step 6: Use the Product Creator to upload your design
Once you’ve got your beautiful designs ready, you can use our powerful Product Creator to upload your design and see a realistic mockup preview of the final product. It is easy to use and very intuitive.
What’s more, you can use these mockups on your digital storefront or social media.
With this design tool, you can easily upload your designs and bring your wildest merchandise ideas to life.
Browse our Catalog and select a Print Provider
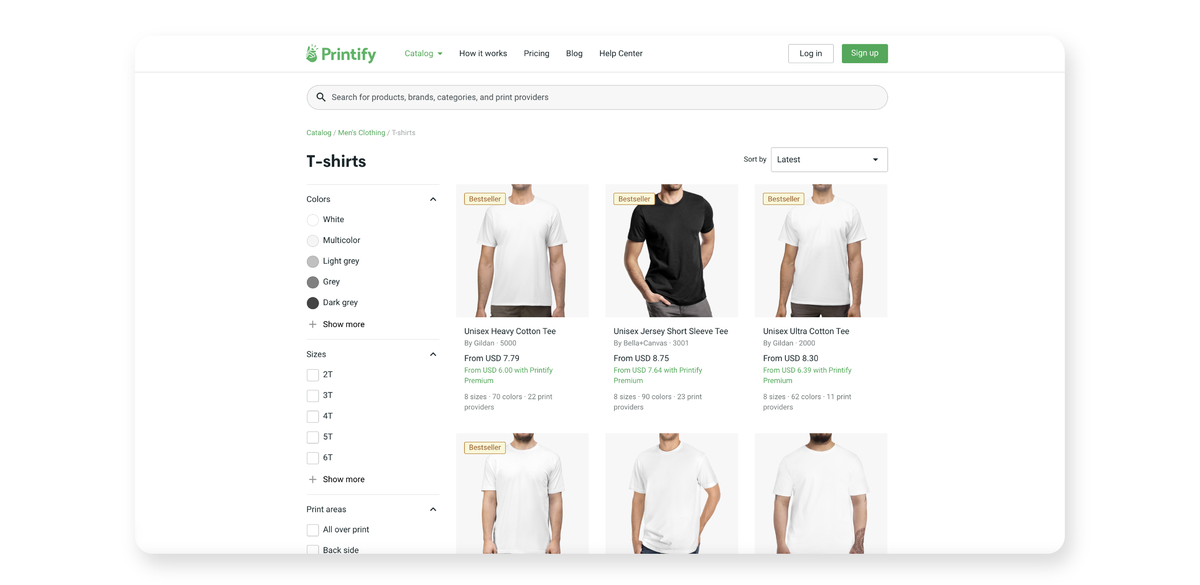
Explore our ever-expanding catalog and pick a product that’s most likely to resonate with your target audience.
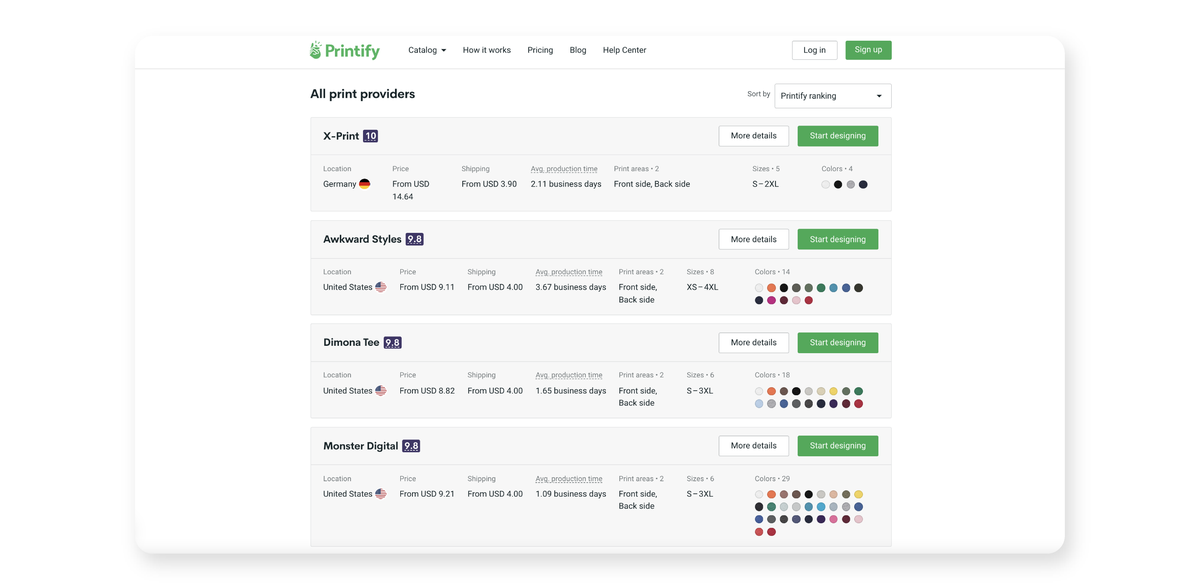
Select a print provider. You can compare them by location, price, available colors, sizes, and more.
Afterwards, click “Start designing” on the product page to open the Product Creator.
Explore the Product Creator
Once the tool opens, you can view the print file requirements, available print areas, prices, variants, and other settings.
Upload your design
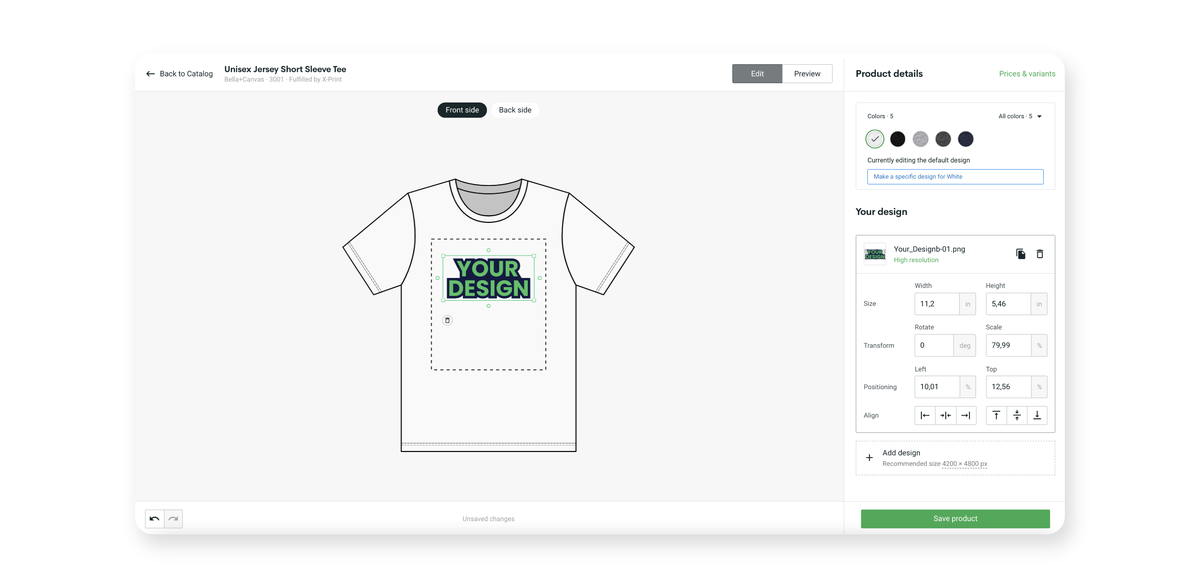
Simply click on the “Add your design” button or drag & drop them from your device, Google Drive, or Dropbox. Your designs are automatically saved and available in the Product Creator library.
Always position your design correctly within the print area to avoid issues with production. Make sure to follow the print file requirement instructions.
Adjust your design
Adjust the placement of your design, and choose the color and size of your item. You can click “Add design” to complement your current product with custom text or another design.
Preview the final product
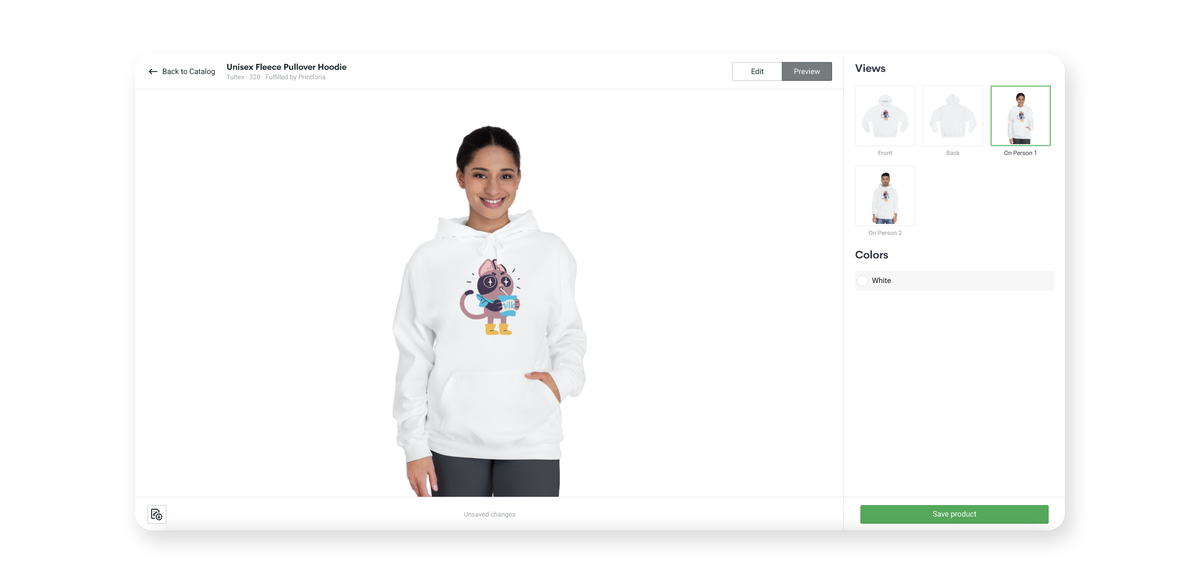
Once the size is right, and the colors look good, click “Preview” to see a real-life mockup of your product. You can use these product images in your online store.
To view the final product and see whether you’re happy with the design, we recommend ordering samples before launching a new product in your store.
What is Printify?
Whatever your goals may be, our mission stays the same – to help merchants make more money with less effort. We always strive for excellence and pride ourselves in enabling people to achieve their life-long dreams of financial success.
Our print-on-demand and dropshipping platform allows you to design and start selling custom products without any hassle.
100% Free
You don’t need any up-front investment. Anyone can use our platform for free.
Wide range of products
Our catalog has over 900 customizable, high-quality products, and we’re continually adding more.
No minimum order quantity
Thrive and sell without any limitations. You can order as few or as many items as you like.
24/7 Merchant support
The customer is our compass. We’re here to help you along every step of the way.
What’s more, once a sale is made, we do all the heavy lifting – printing, inventory, and shipping.
We work diligently to make sure that you’re getting the highest quality products, best prices, and shipping rates.
The best part is that registering is absolutely free.
In conclusion
Whether you’re just starting out or have been in the print-on-demand business for a while, we hope that these graphic design tips, tools, and resources will help you along your entrepreneurial journey.
As long as you take your time, do your research well, and use all available resources, you can easily find inspiration and the right tools to create eye-catching designs that are sure to become your next – or very first – bestseller.
