Create custom designs that sell
While the print-on-demand business model has taken over eCommerce, it’s becoming more difficult for merchants to stand out. Every day, thousands of new vendors begin their POD adventures.
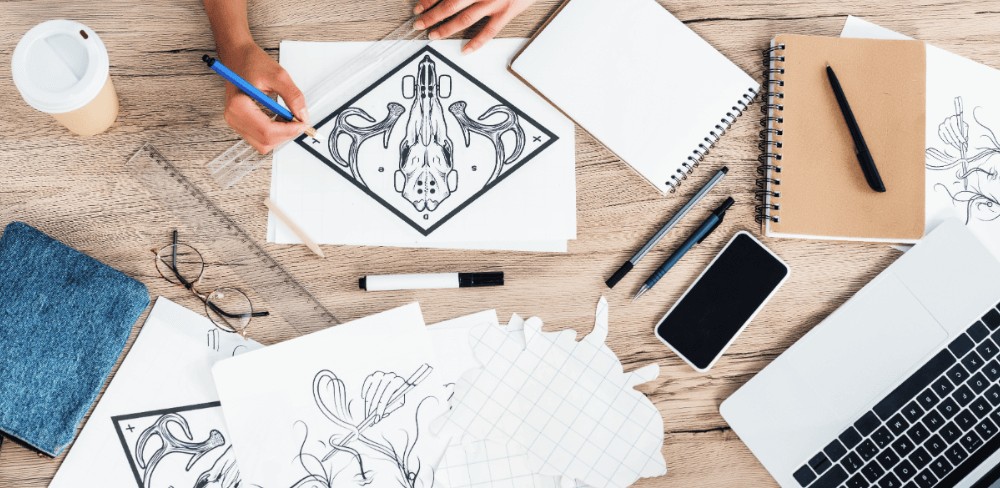
With this in mind, one of the best ways to boost sales is by using original artwork. Indeed, instead of following the mob and ripping off someone else’s design, creating, drawing, sketching, or photographing something entirely new is better.
Follow this guide to put that artwork onto products as beautifully as possible. Let’s go over how to make your store’s designs shine brighter than anyone else’s.
Simplicity
Technical processes don’t have to be complicated. In the Printify world, things are designed to be incredibly user-friendly.
Profitability
Using new material means more profits — instead of giving that money to a designer, artist, or integration (like Shutterstock).
Individuality
Developing your brand along a consistent, personal theme makes more sense, rather than copying another brand’s artwork.
24/7 Support
We’re on your side every step of the way. If you can’t figure something out, please get in touch. We’ll do our best to help.
Digitization – what does it mean?
This is the process where a merchant takes artwork and converts the image, design, drawing, etc., into a language that printing and/or embroidery machines can understand — in digital storage.
Then, those professional service printers and seamsters can use that information to create, print, and sew that piece of artwork onto various print-on-demand products.
How can I digitize an image?
This comes down to getting artwork into a digital copy on a computer. The fastest ways here are to take a picture or use a scanner (or even a specialized film scanner). This process can even work for an entire photo collection.
Of all the tips below, be sure to use a high-resolution save. Sometimes, people upload digital copies but then translate them to lower-quality formatting. Be sure to keep this from happening.
1. Photographing in the digital age
Consider using these details when shooting. They all add up to a significant difference in the final product’s outcome. Please remember, these are recommendations, not necessities.
- Use a timer rather than pressing the button. Sometimes, a small shake can occur in the camera — resulting in a slight blurring effect.
- Use clear, even lighting. If there is shadowing or shading, things could render improperly.
- Avoid using flash. This can cause a reflection to shine unevenly from various colors or angles.
- Shoot your photo albums (or individuals) at the highest resolution possible for your camera. This way, you’ll be able to work with more sizes on products.
- Line up the camera’s lens with the middle of the artwork being shot. With this in place, the framing of the artwork will come out better.
- ISO + Aperture: These camera settings adjust how sensitive the camera is to light by adjusting the dimensions of their diaphragm. To digitize the image crisp and clear, consider using a lower ISO. Studios often shoot at ISO 100 or so.
- DSLR Tip: For these devices, it may be a good idea to use an f-stop (light allowed into the lens) of f-8 to f-10.
2. Scanning to digitize an image:
Unlike some conventional printers, scanners are usually pretty easy to use. Unfortunately, they’re traditionally limited to an A4-size (piece of writing paper) scanning area. So, you’re more limited than a photo in scope when walking down memory lane.

What you see vs what you get
People see colors differently than computers. This means that the version of an image uploaded to a computer may change. This is because there’s a massive disconnect between physically creating a color on a t-shirt, hoodie, mug, etc., relative to projecting colored light.
But this doesn’t mean that there isn’t quality work going on. It’s just a logistical reality that can be easily fixed.
How computer screens read: Red green blue (RGB)
This is how a computer screen projects various colors. Every device is powered by a light source within that shines those rays through various segments of color. It’s called the additive color model.
First, only a dark light is shown. But, by adding controlled tones of red, green, and blue, a wide range of colors can be created. However, even with the current reaches of technology, we cannot recreate the diversity and wonder of the human eye within a screen. Nature still manages to amaze.
How printing computers create merchandise
This is how printing machines create colors on a garment or product. Unlike merely projecting a color, physically creating a colored ink and causing that ink to bond with various fabrics is a bit more complicated. As such, the large-scale printers that create print-on-demand products rely on combinations of cyan, magenta, yellow, and key (black).
While screen-based processes use the additive concept, physically creating an image relies on subtractive mixing. This begins with a pure white, with colors subtracted as layers of cyan, magenta, yellow, and black are removed until the proper color is uncovered.
Troubleshooting early problems
When you upload, scan, or transfer a printed photo or image to be digitized, you’ll usually be looking at an RGB (human vision) picture. Remember, this will usually be transferred to CMYK once it’s in digital files.
So, one of the best ways to ensure your artwork looks the same on both sides is to use CMYK from the beginning. This provides the most accurate final products.
Uploading images to the Product Creator
Uploading a printing file as either a JPEG or PNG is possible. Please be aware that both files have differing capabilities.
- JPEG: Supports RGB, sRGB, and CMYK for all Printify products. Transparent backgrounds are not supported.
- PNG: Supports RGB and sRGB for all Printify products. Transparent backgrounds are supported.

Why you should digitize images
It translates to more defined niche targeting, higher customer traffic, increased sales, and better business orientation.
Let’s break that down. Using digitized images and unique branding helps you:
- Define your niche: A niche is the group of people you’re specifically trying to sell merchandise to. One niche could be fans of outer space.
Here, it’d be a good idea to create a few intergalactic designs and digitize them onto some products. Then, when these individuals see how cool your cosmic collection is, they’ll be drawn in. Any time a person wears, displays, or uses your gear in public, that’s great (free) advertising. - Attract end-customers:There are so many bad designs out there right now. The eCommerce environment has long since become saturated with waves of inferior, substandard merchandise. This sets a merchant’s products up to stand out. These items are new — unique — interesting. People like buying new things.
- Boost sales: When more people come into a store (virtual or otherwise), the likelihood of them purchasing also increases. Furthermore, a store’s items will have improved aesthetic appeal. This directly impacts sales volume.
- Improve operations: Putting in an honest, earnest effort pays dividends regarding the development of a store’s brand. The implementation of such business practices plays a significant role in merchant success, enjoyment, and motivation.
Consider some post production
After a piece of artwork has been securely uploaded to a computer, this allows for digital improvement. It’s possible that some elements were converted during the digitization process. So, be sure to check for these differences.
While there are tons of amazing editing software out there, these packages can get pretty expensive. Fortunately, there are several free online image editors. For those on tighter budgets, here are some quality, bang-for-you-buck contenders:
Fixing quality, resolution, print file, and dpi problems
It’s almost like these terms were designed to be confusing: file size, dots per inch (DPI), resolution, quality, etc. They all boil down to how good an image looks on a screen (and in print). The idea is that the contents of a file are translated into a digital form readable by a printing or embroidery machine.
When you upload an image to the Product Creator (formerly known as Mockup Generator), a “Low Resolution” alert may pop up. This means that there are some problems. Here’s how to fix that:
- Scale the design size down. This will improve resolution immediately.
- Recreate the design using less demanding elements.
- Choose a different design.
- Retake the picture. Often, this one is the key to digitizing photos.
Now, it’s possible that none of these solutions serve. If that’s the case, try to implement some of these helpful resolution pointers:
- Dots per inch (DPI): As a general rule, use a DPI of 300 for most products. However, some larger items may need a DPI of 120-150.
- Cover the print area fully: When you do this, the machines will never crop, shift, or change your design around.
- Check pixels: You can find the pixel size near the upload button in the Product Creator.
- Use consistent metrics: There are different ways of measuring the same printing area. For example, these are all measurements for large direct-to-garment (DTG) printers:
- 300 dots per inch
- 4500 x 5100 pixels
- 15 inches by 17 inches
- Double check images: Even when you think everything has gone perfectly, it’s worth a second look.
- Don’t exceed 50 MB: Just don’t go bigger. That complicates things.
- Tinker and improve: Sometimes, a small tweak can be the difference between a piece of great art and an average one. Furthermore, variations of pieces are a stellar way to solidify branding opportunities. They show the development of the brand’s image over time.
How long does it take to digitize?
The first time a product is digitized, the conversion can take some time. However, after that first digitization, every following order will go through immediately — as long as the orders have the same sized design.
What to do with digital photos?
Here, the hard part is done. If you want to digitize your photos, select the product you’d like to work with from the Printify Catalog, upload the desired photo to the Product Creator, and you’re ready.
As mentioned above, the easiest way to digitize photos is by using a scanner or taking a photograph. There are several useful hints, tips, and tricks above that could be of use here.
Easy
But what if you’re not a designer? Well, there are quite a few ways around that. Feel free to check out a few of our favorites:
Shutterstock
This is a digital library containing millions of high-quality images. If you find a photo you’d like to work with, their pay-as-you-sell system means you won’t have to pay to use anything until it sells.
Furthermore, several cutting-edge editing tools allow you to crop, isolate, and even manipulate image backgrounds. Even if you don’t end up using one of their digitized documents, it can be worth looking through for some inspiration.
Text editor
Using digital technology to make cool printed photos or digitizing images can be tempting, but it can be difficult. Fortunately, products that have simple, text-based messages or branding often sell very well.
Free designs
Everyone has to start somewhere. And, while these designs may be far from ideal for your store’s final destination, they’re perfect for trial, mockups, and even making a few sales. While it may say that they’re just for t-shirts, these designs are perfect for any Printify product.
Digitizing services
This may be the best bet for those who believe you get what you pay for. If cash isn’t a problem, getting an expert opinion (and work) is a wonderful option.
Fortunately, this choice can be difficult to scale over time. If a brand wants to develop and spread over time, these professionals are always ready to lend a helping hand.

7 Steps to print-on-demand digitization success
- Acknowledge the potential: The eCommerce and custom clothing segments are all expanding rapidly. This is a perfect time to join the POD game.
- Technology and sales: There are a bunch of recent developments unfolding that help entrepreneurs succeed.
- Believe in yourself: This is the moment to choose to act. Fortunately, Printify is free. So, there’s nothing to lose.
- Start creating: This can be a drawing, a sketch, or old photos. It doesn’t have to be vector files or something unattainable. Just start building and let it flow.
- Digitize that work: This process should be simple with a camera or scanner. Everything is detailed above.
- Design products: With multiple photos or digital files ready to go, simply slap those images onto Printify products. Those products can be listed on any number of eCommerce platforms or marketplaces for discovery and sale.
- Printify successfully: Remember, we’re always behind you. If you require any assistance, please don’t hesitate to contact our 24/7 Support Team.
Frequently asked questions
Scan your image with a flatbed scanner or photograph it with a high‑resolution camera. Save the file in a common format like JPEG or PNG. For quick results, use apps like Adobe Scan or Google PhotoScan. Adjust brightness, contrast, and crop for a clean, usable digital copy.
Place the image on a scanner or snap it with a quality camera or smartphone. Save it as a digital file (JPEG, PNG, TIFF). Mobile apps like Microsoft Lens or PhotoScan make this process easy. Make sure the digitized quality matches the original, improving it with design software like Canva or Photoshop if necessary.
Digitizing a photo means turning a physical image into a digital file that you can store, edit, or share online. This is usually done with a scanner, camera, or specialized app. Once digitized, your photo can be backed up, restored, printed, or used for digital projects without risking the original.
Use a high‑resolution flatbed scanner to capture every detail without glare for best results. Clean the photo gently beforehand, scan at 300-600 DPI, and save in TIFF for archiving or JPEG for sharing. For quick, decent results, try mobile apps like Google PhotoScan or professional digitizing services like ScanMyPhotos.
Use a scanner or high‑resolution camera to capture the analog image. Save it as a JPEG, PNG, or TIFF file. If needed, edit with software like Photoshop or GIMP to restore colors and sharpness.
