Sell custom products with Printify
Wondering how to set up WooCommerce and start selling in 2026? You’re in the right place. This quick, no-fluff guide breaks it down into seven simple steps.
WooCommerce makes it easy to build, customize, and take full control of your online store, so let’s get started and launch your eCommerce empire.
This post may contain affiliate links, which means we may earn a commission if you make a purchase through those links. This comes at no additional cost to you.
Key takeaways
- Install WooCommerce manually for complete control or use the WooCommerce setup wizard for a guided process.
- Compare hosting providers carefully, considering both initial and renewal costs. Options like Hostinger, Bluehost, and SiteGround offer WooCommerce-optimized plans.
- To optimize your store, pick a fast,mobile-friendlytheme, install important plugins, and configure settings like taxes, shipping costs, and payments.
- Easily connect WooCommerce with Printify to create and sell custom products without managing inventory.
- Use WooCommerce SEO, email marketing, social media, and abandoned cart recovery to attract customers and grow your store.
What is WooCommerce?

WooCommerce is an open-source eCommerce plugin developed by Woo.
It integrates seamlessly with WordPress websites, empowering eCommerce businesses to sell physical and digital products. Compared to hosted platforms, WooCommerce offers full customization, flexibility, and no site restrictions.
Why choose WooCommerce?
- Unlike closed platforms, WooCommerce gives you complete ownership and lets you control your store’s data, design, and pricing models.
- Choose from thousands of WooCommerce templates and plugins to personalize your store.
- Whether you’re selling a few products or managing a large catalog, WooCommerce can grow with your business. Start small and expand with paid extensions and third-party integrations.
- The WooCommerce plugin is free and cost-effective. You only pay for hosting, a domain, and any optional paid extensions you choose.
- As of Q4 2024, WooCommerce achieved widespread adoption with a 39%market share among eCommerce platforms worldwide.
Setup and activate WooCommerce in 7 easy steps

If you’re starting fresh or migrating from another platform, follow these seven steps to easily install WooCommerce, configure your online store, and start selling.
Step 1 – Understand your options and choose the right setup
There are several ways to set up WooCommerce, but no matter which route you take, these three steps are always required:
- Getting a hosting provider – This is where your eCommerce website will be stored. Your hosting provider will also help you register a domain name (your online store’s web address). While you can purchase a domain separately, most web hosting services make the process easier by offering it as part of their plans.
- Installing WordPress – This is where you’ll build your site, create pages, customize layouts, and add features through themes and plugins.
- Installing the WooCommerce plugin – WooCommerce is what adds eCommerce functionality to your WordPress site, enabling you to sell products, accept payments, and manage shipping.
Important considerations before you choose web hosting
Before committing to a provider, be sure to compare pricing – for the first year and for renewal costs. Many providers offer discounted rates for new customers, but prices often increase upon renewal. Checking future pricing now will help you avoid surprises down the line.
Also, consider purchasing hosting when setting up WooCommerce, as many providers offer discounts when bundling hosting, domain registration, and SSL certificates.
Popular providers for WooCommerce
- Hostinger – Affordable WooCommerce-optimized hosting, starting at $2.49/month.
- Bluehost – Officially recommended by WordPress for WooCommerce, starting at $7.45/month.
- SiteGround – Known for fast speeds and strong security, starting at $2.99/month.
Once you’ve chosen a hosting provider, you’re ready to install WordPress and set up your WooCommerce store.
Step 2 – Install WooCommerce from scratch (recommended method)
Now that you’ve done your research and chosen a provider, it’s time to set up your online store. The easiest and most flexible way to do this is by installing WooCommerce from scratch. It might sound technical, but don’t worry – most hosting providers simplify the process with clear instructions and one-click installations.
This method gives you full control over your store while letting you compare hosting prices and renewal costs before committing. Plus, you’ll have a clean setup without any unnecessary extras.
Here’s how to do it:
- Choose a provider and register a domain – Sign up with a Woo-friendly host like Hostinger, Bluehost, or SiteGround. Many providers offer free domain registration when you purchase a hosting plan. For this WooCommerce tutorial, we’ll use Hostinger as an example to walk you through the process.
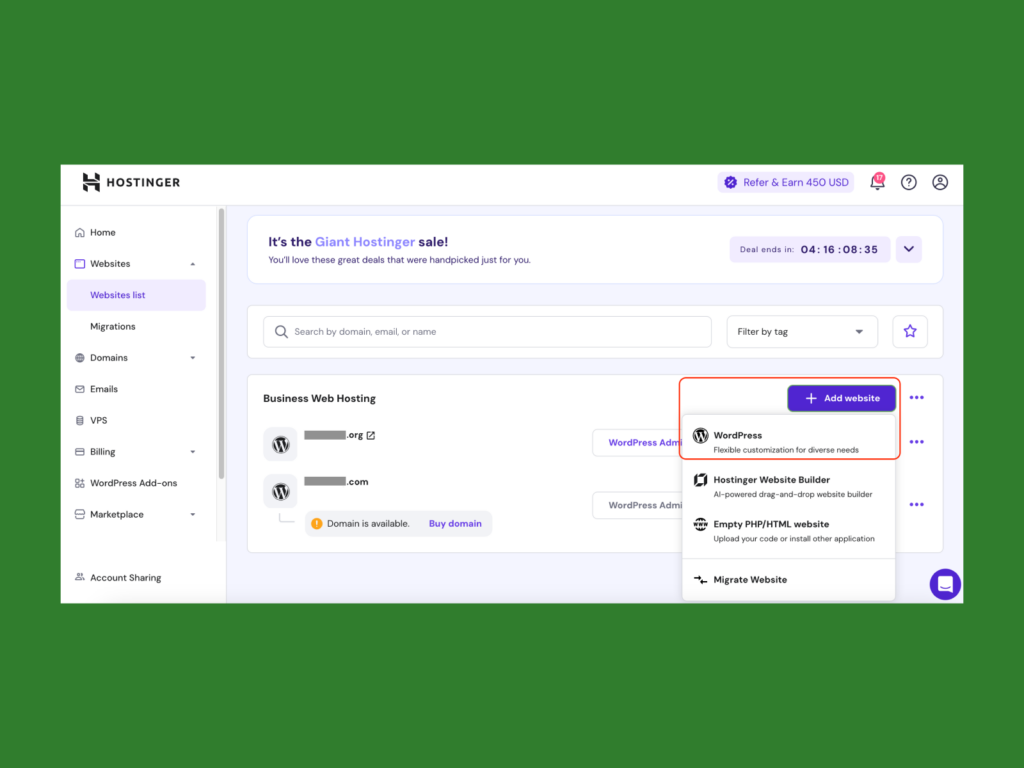
- Install WordPress – Log in to your hosting account and look for the one-click WordPress installation option (usually in the dashboard or cPanel).
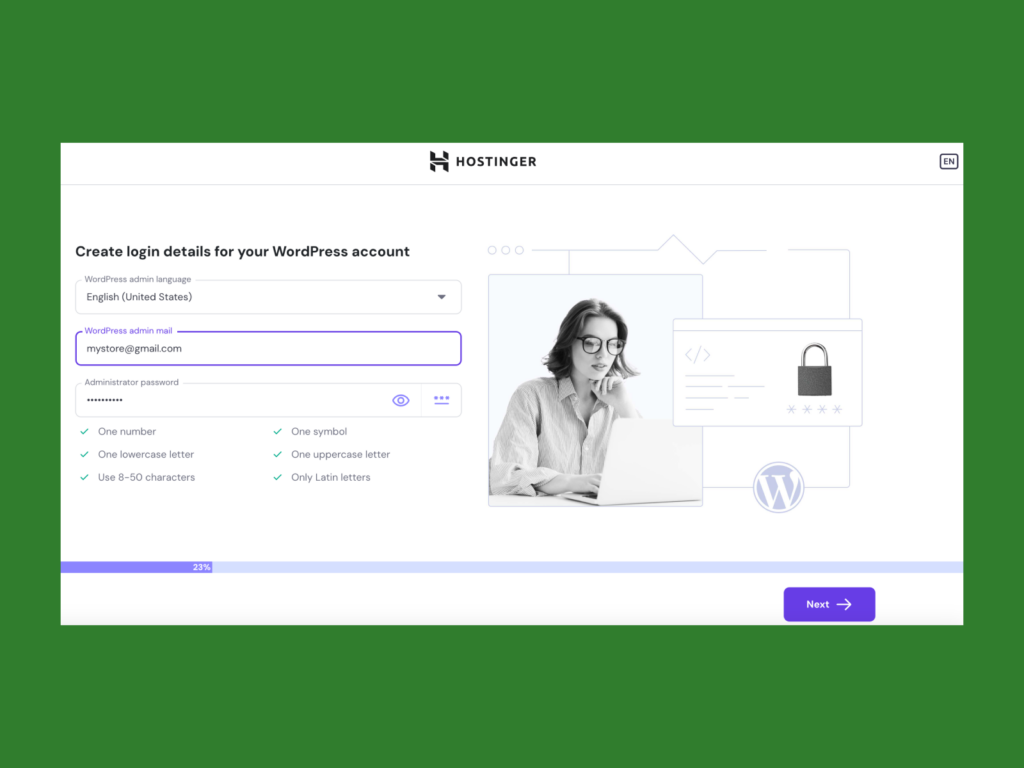
- Enter your login details to create a WordPress account or log into an existing one, select your domain name, follow the prompts, and wait for the installation to finish.
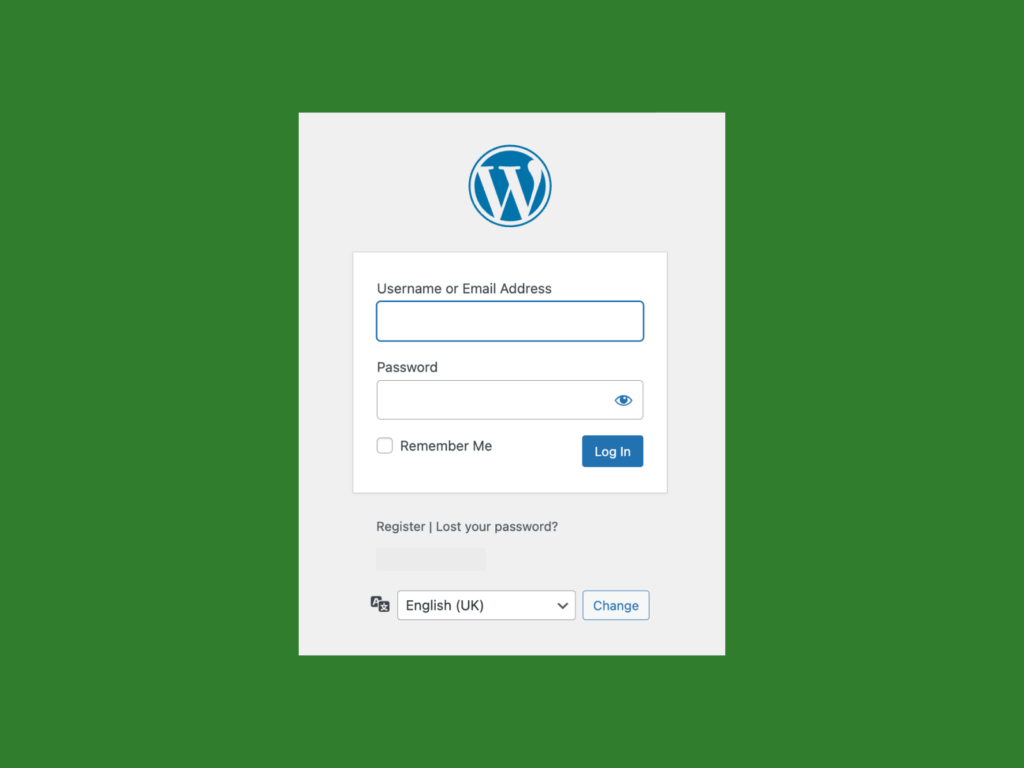
- Access your WordPress dashboard – Once WordPress is installed, log in by visiting yourdomain.com/wp-admin and entering your login details.
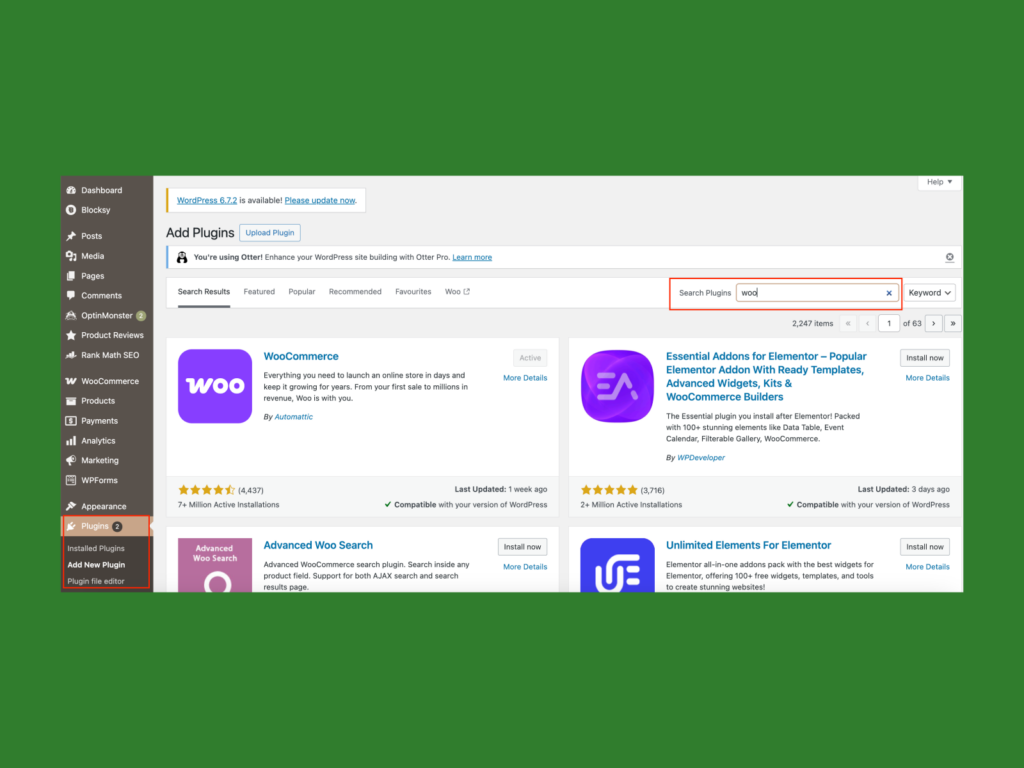
- Install WooCommerce: In the WordPress dashboard, go to Plugins > Add New, search for WooCommerce, then click Install Now and Activate. This process is the same as installing any other WordPress plugin.
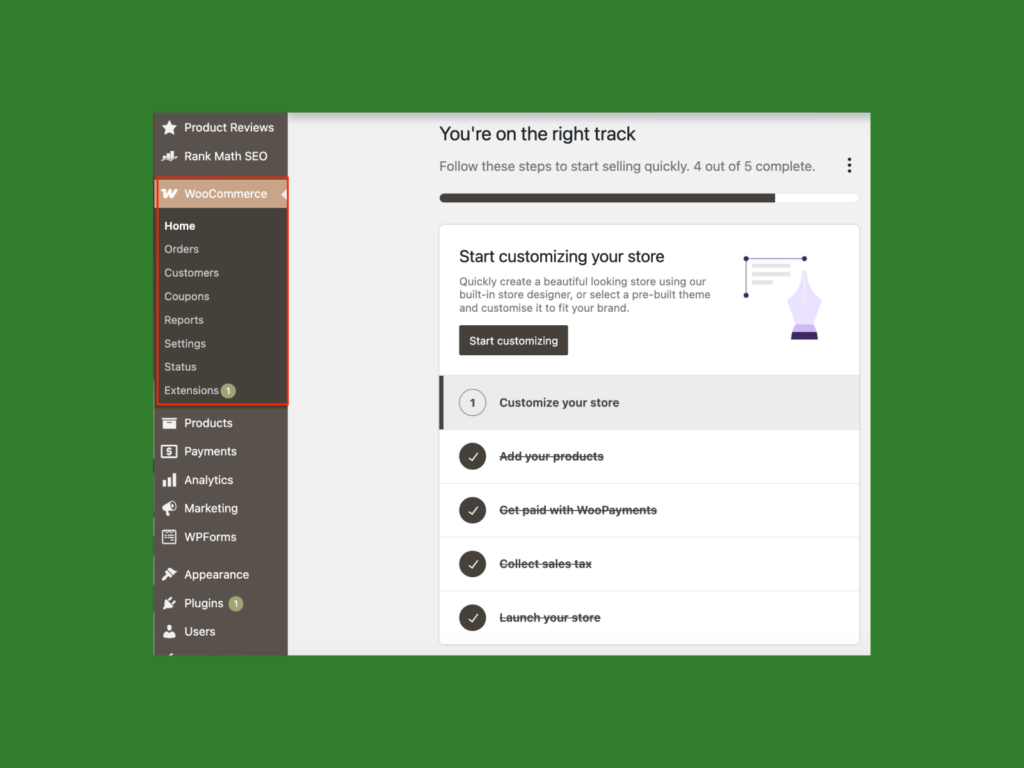
- Go to the WooCommerce tab and follow the setup checklist. WooCommerce will launch a quick setup guide, where you’ll enter your store details, industry, product types, business settings, and payment options. More on that later.
Step 2 (alternative) – Use the WooCommerce setup wizard
Woo simplifies the store setup process with a setup wizard that guides you through choosing a hosting provider, installing WordPress, and configuring everything manually.
You still have to choose a provider, domain name, and WordPress account.
Here’s how to set up WooCommerce using the setup wizard:
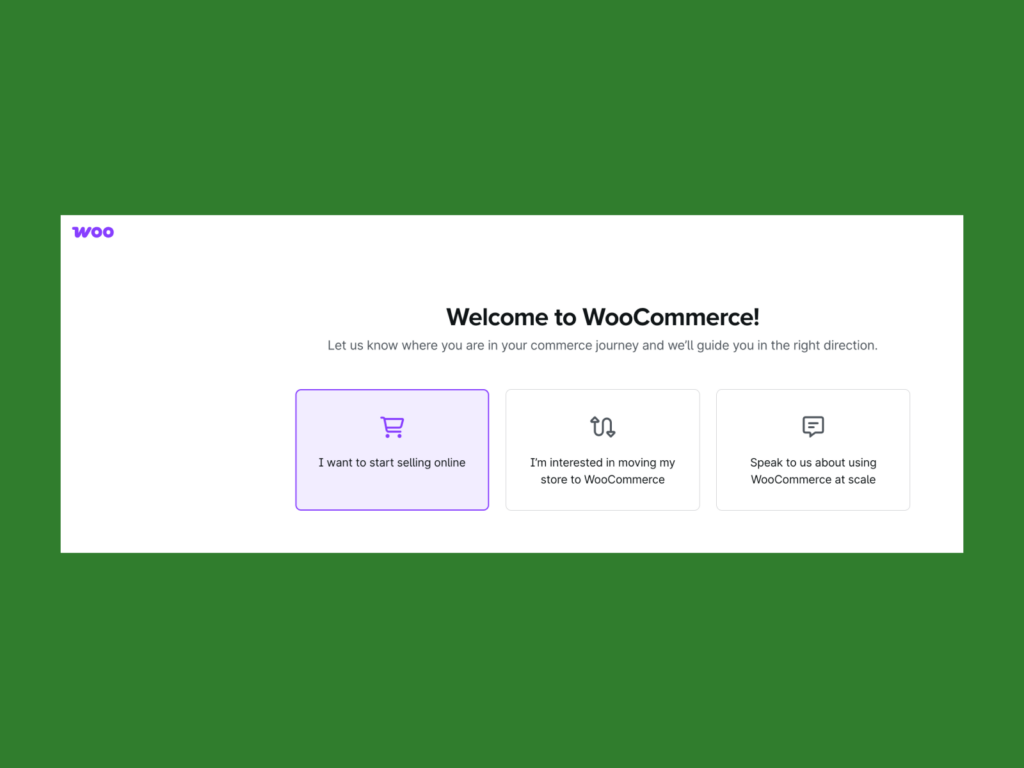
Go to WooCommerce’s setup page and click I want to start selling online.
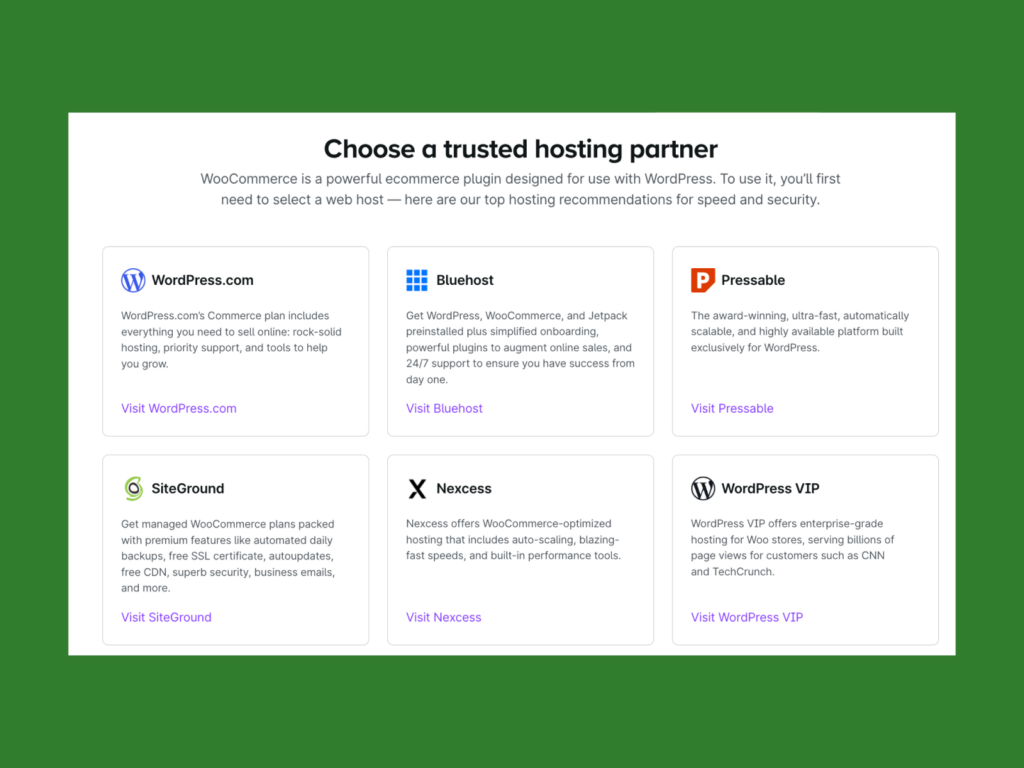
Choose a provider from Woo partners (WordPress.com, Bluehost, Pressable, SiteGround, Nexcess, WordPress VIP):
Follow the setup prompts – Set up a WordPress account, pick a domain name, and install the WooCommerce plugin, just like in the standard WooCommerce setup.
WooCommerce’s setup wizard includes WordPress.com and WordPress VIP, both owned by Automattic (the company behind WooCommerce). While these options simplify store creation, they offer less control and cost more than self-hosted WordPress.org setups.
For full ownership and flexibility, choosing separate hosting and installing WooCommerce manually (as outlined in the previous step) may be the better choice in the mid and long term.
Step 3 – WordPress setup
Before setting up WooCommerce, let’s make sure your WordPress site is ready to go. The first thing you’ll need is a WooCommerce theme – this gives your store its look and feel.
A good theme isn’t just about looks, though. It should be fast, mobile-friendly, and SEO-optimized so your store loads quickly and ranks well on search engines.
There are plenty of options, both free and premium. Here are some great picks:
- Astra – Super lightweight and customizable, excellent for performance.
- Flatsome – A top choice for eCommerce with built-in design tools.
- Neve – Fast, modern, and built for WooCommerce.
- Storefront – WooCommerce’s official theme, designed for seamless integration.
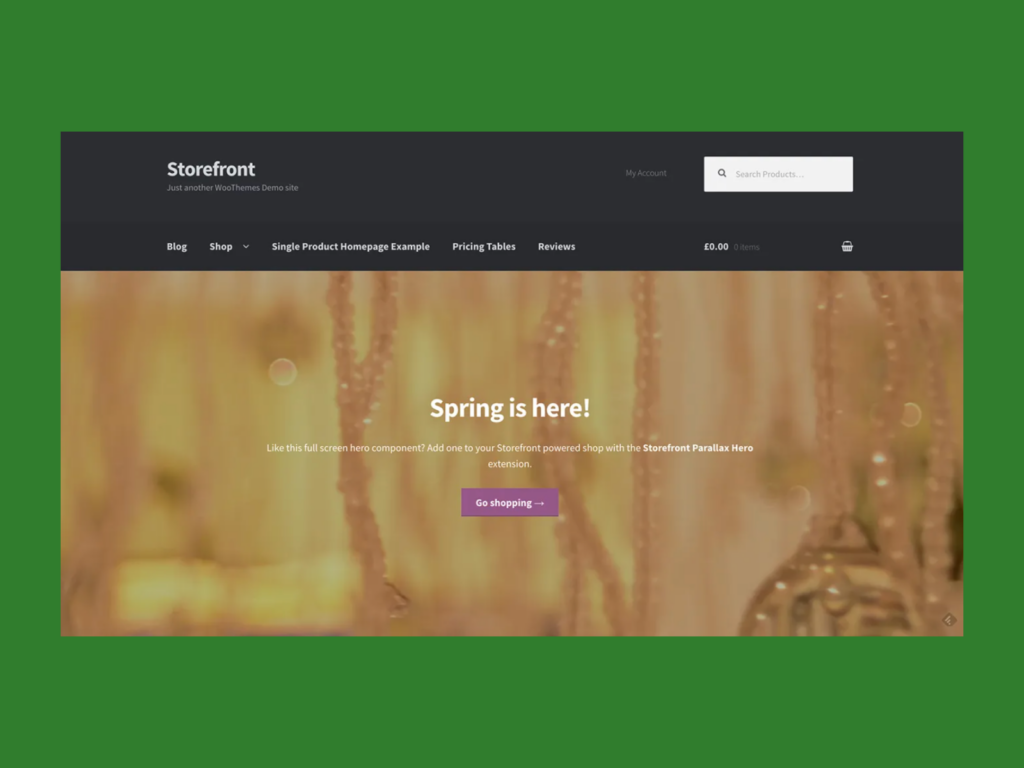
Need more ideas? Check out our full guide on thebest WooCommerce themes.
Next, let’s add a few WordPress plugins to improve your store’s functionality:
- Yoast SEO – Helps your store show up on Google.
- Wordfence – A security plugin to keep hackers out.
- WP Rocket – Speeds up your store so pages load faster.

Want to improve your store’s visibility and get more traffic? Check out our guide onWooCommerce SEO.
Step 4 – Configure the WooCommerce plugin settings
Now that your theme and plugins are set, it’s time to fine-tune WooCommerce settings to make sure your store runs smoothly.
Go to the WooCommerce tab in your WordPress dashboard, then click Settings.
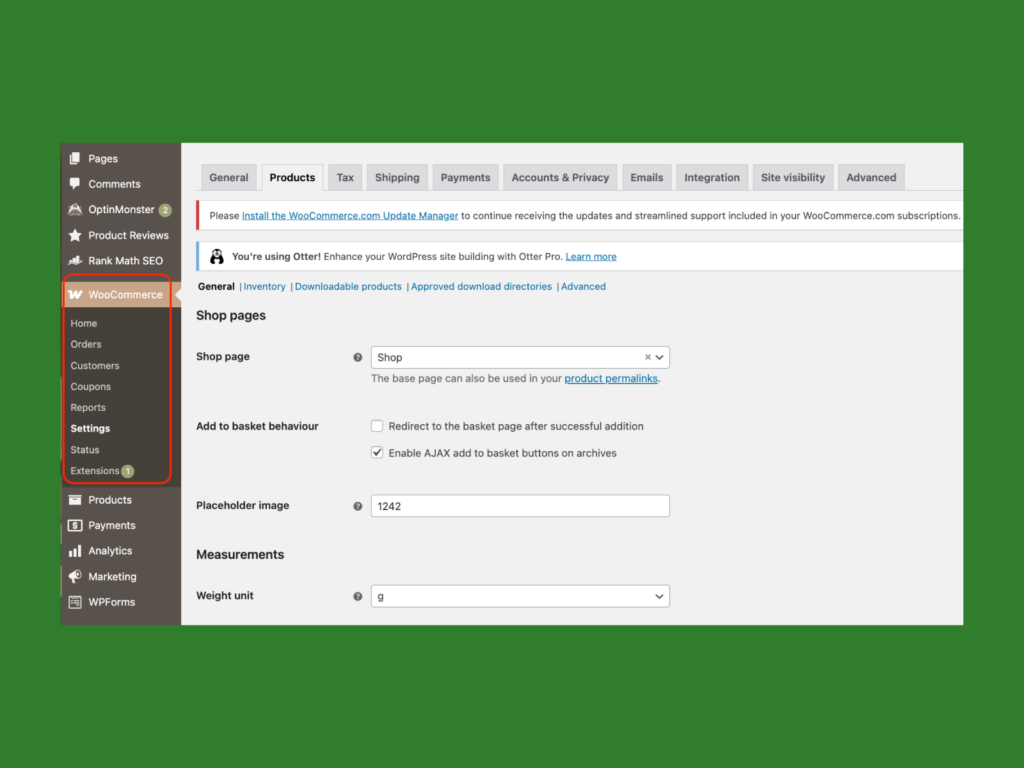
Here, you’ll configure important areas, including:
- General – Set your store location, currency, and default customer settings. These basics help WooCommerce apply the right tax, shipping, and payment rules based on your customers’ location.
- Products – Choose measurement units, set default placeholder images, and decide whether to enable product reviews for customer engagement. Most importantly, select where to link your main shop page in the website menu – WooCommerce will automatically display products there.
New users often look for this page in the WordPress dashboard without success, as it’s managed in WooCommerce settings, not the regular WordPress “Pages” section. - Tax – WooCommerce includes built-in tax options, allowing you to automate tax calculations or manually configure tax rates. Choose whether to include tax in product prices or calculate it separately based on the customer’s shipping address. Keeping pricing consistent from product pages to checkout avoids confusion and builds trust.
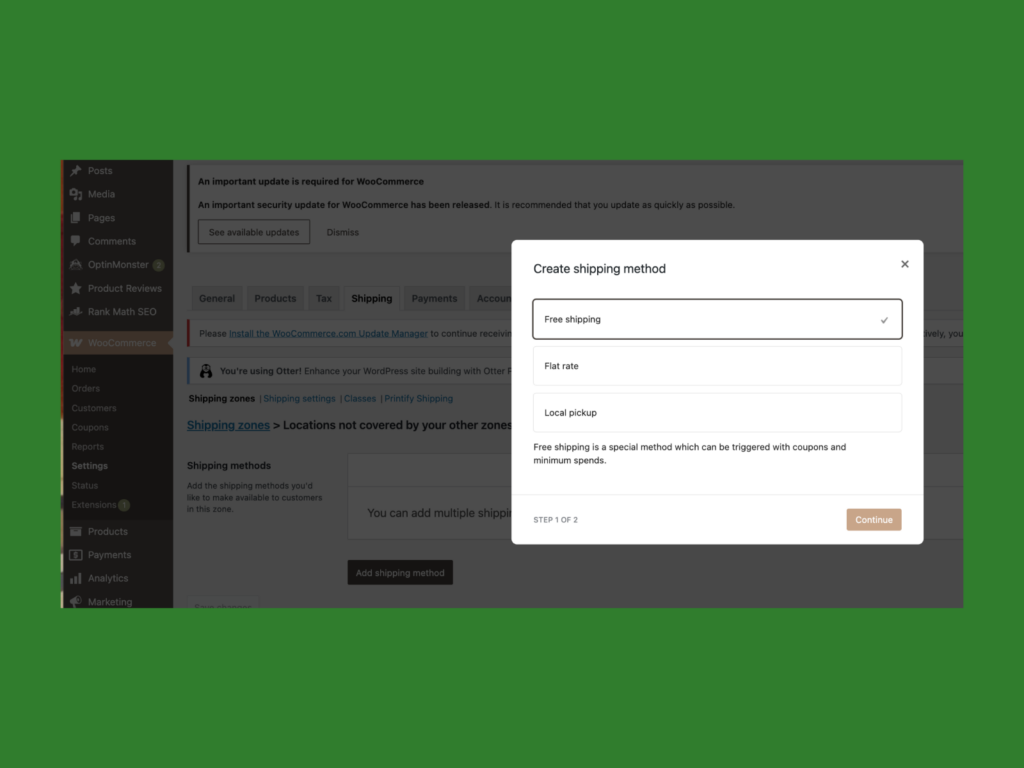
- Shipping settings – Define shipping zones and shipping methods based on where you sell. Set different rates for various regions, depending on your fulfillment provider. The shipping tab also lets you enable a calculator at checkout, so customers can see costs before finalizing their purchase.
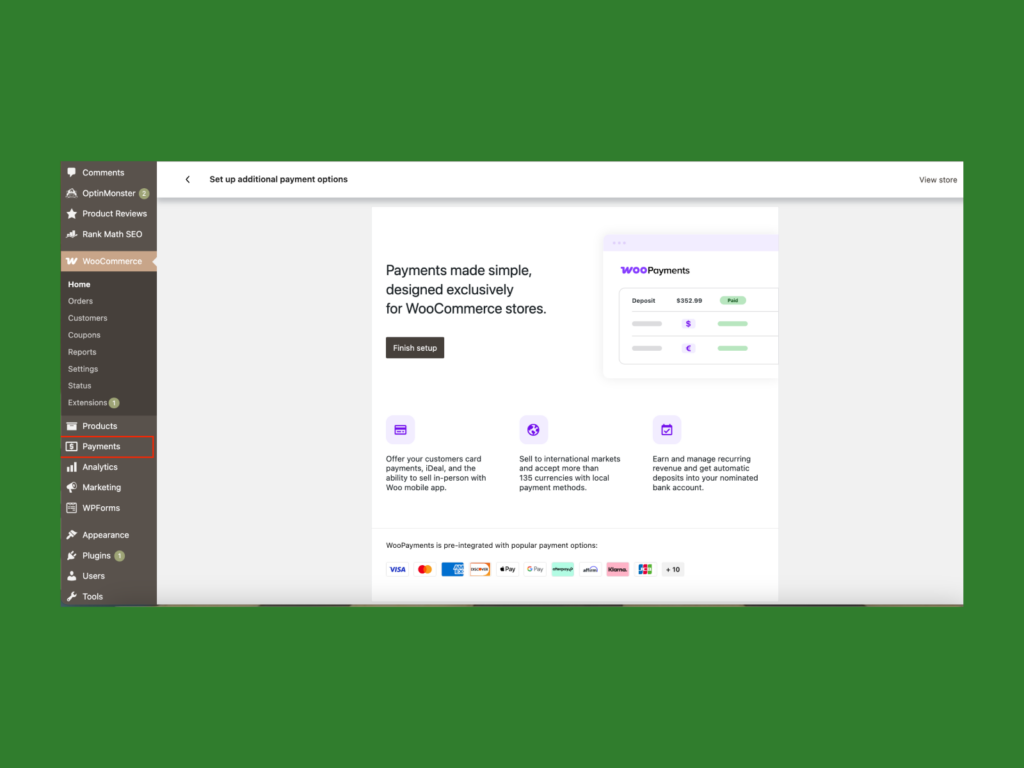
- Payments – Manage payment processors like PayPal, Stripe, and bank transfers. Add more options from the WooCommerce extension store, including Buy Now, Pay Later services, or cryptocurrency payments. Sort the order of payment options to prioritize the most commonly used methods. Note that the proprietary WooCommerce payment method is available in selected countries.
- Accounts and privacy – Control how customer accounts work, including guest checkout options, privacy policies, and data retention settings.
- Emails – Customize order notifications, customer emails, and admin alerts to keep communication clear.
- Advanced options – Configure checkout behavior, REST API settings, and additional eCommerce features.
Once these settings are in place, your WooCommerce store is fully functional! Next, it’s time to add products and start selling.
Step 5 – Integrate Printify with WooCommerce
Let’s connect your store to Printify and start selling custom products.
- Log in to your Printify account.
- Click on the user icon in the upper-right corner and select My stores.
- Click Add new store, then select WooCommerce from the list. All available integrations are also listed under Integrations at the bottom of any Printify page.
- Enter your WooCommerce store URL, then click Connect.
- When prompted, click Approve and wait for the connection to complete.
That’s it! Your Printify store is now linked to WooCommerce, and you can start adding products.
Make it happen
Sell physical goods with Printify and Woo – no inventory management.
Step 6 – Manage products in WooCommerce
While Printify lets you tweak designs and product details before publishing, WooCommerce gives you full control over pricing, descriptions, product categories, tags, and visibility.
Add products from Printify to WooCommerce:
- Log in to Printify and pick a product from our Catalog.
- Upload your design using the Product Creator.
- Customize product details, including title, description, and pricing.
- Click Publish, and the product will sync to WooCommerce.
Once your products are in WooCommerce, fine-tune them further.
Check out our blog article for more information on product pricing.
Edit WooCommerce product details:
- In the WordPress dashboard, go to Products and select the item you want to edit.
- Adjust the product name and refine the description – use Printify’s details as a base, but make it unique and engaging.
- Scroll down to edit product data, including pricing, stock status, and shipping costs. Printify products don’t require manual inventory management since stock updates automatically.
Want to sell digital products on WooCommerce? Get inspiration for selling downloadables on our blog.
- On the right-hand side, assign categories and tags to help customers find your products. For example:
- Categories: Apparel (t-shirts, hoodies), Accessories (hats, bags), Home Decor (posters, rugs).
- Tags: Seasonal designs, funny quotes, minimalist, vintage.
- Click Set product image to upload a high-quality product photo. Good visuals make a huge difference in sales – make sure images are clear, well-lit, and accurately represent your product.
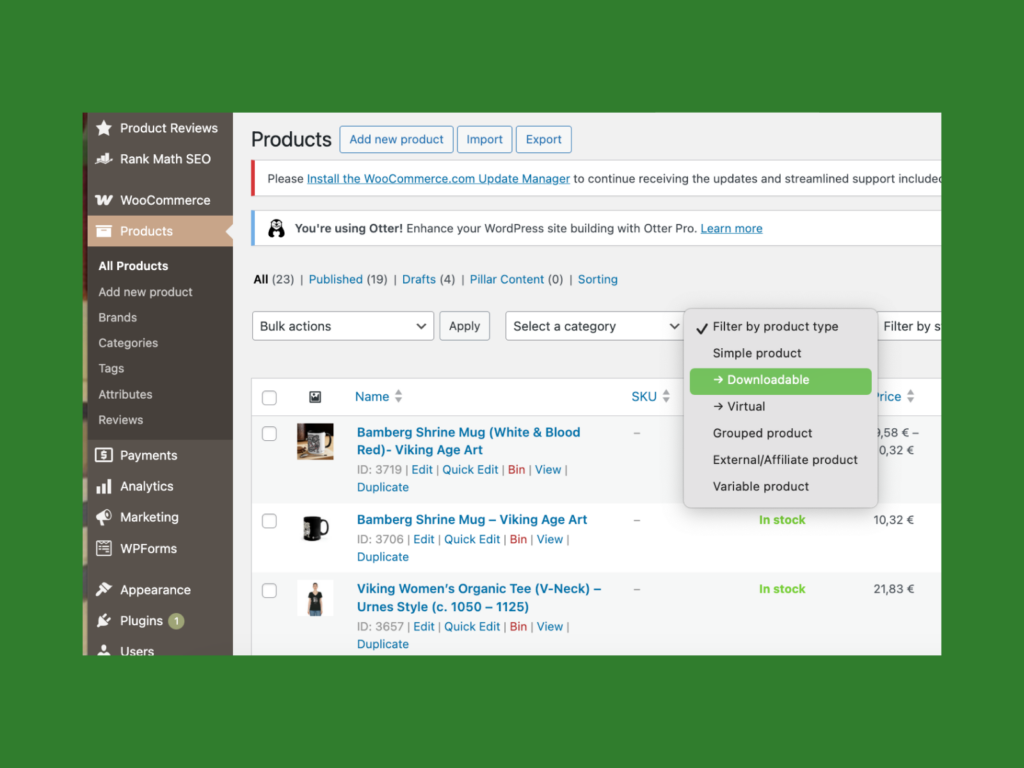
Check our blog for a complete guide to taking good product photos.
Control product visibility:
Before publishing, decide how your product will appear in your store:
- Shop and search results – Visible everywhere (best for most products).
- Shop only or search results only – Limits visibility to one or the other.
- Hidden – Only accessible via direct links (useful for exclusive products or pre-launch items).
Manage orders, coupons, and customers:
Beyond adding products, WooCommerce gives you full control over store operations:
- Orders – In WooCommerce > Orders, view and manage all customer purchases. Each order has a unique ID with details like the purchase date, status, and total price. You can update order status, issue refunds, edit shipping options, or adjust sales tax rates if necessary.
- Coupons – Create and manage discount codes in Marketing > Coupons. Click Add coupon, generate a unique code, choose a discount type (fixed, percentage, or free shipping), and set an expiry date. Share the coupon code via email or social media, and customers can apply it at checkout.
- Customers – Keep track of your buyers in WooCommerce > Customers. See order history, spending habits, email addresses, and average order value to better understand your market and fine-tune your marketing strategy.
- Reports – Get insights into your store’s performance in WooCommerce > Reports. Track sales, product popularity, and customer behavior over time to identify trends and improve your offerings.
Step 7 – Promote and grow your WooCommerce store
A great-looking store won’t bring in sales if no one can find it. Promotion is key to driving traffic and turning visitors into customers. Here are some effective ways to grow your WooCommerce store.
Optimize your store for a great user experience
Most shoppers decide within seconds whether to stay or leave your WooCommerce website. To keep them engaged, make sure your store is:
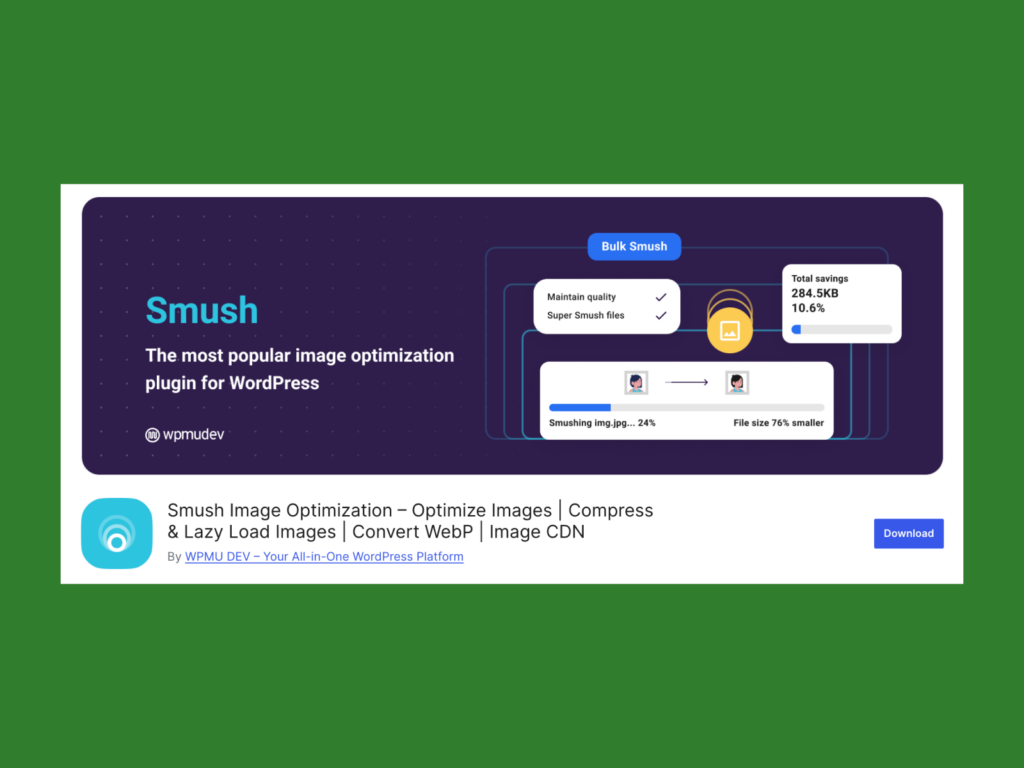
- Fast – Use a lightweight theme like Astra or Neve to improve loading times. Compress images with tools like Smush or Imagify to further speed up your site.
- Easy to navigate – A clear menu, search bar, and well-organized categories help customers find what they need.
- Mobile-friendly – Over half of online shopping happens on phones. Choose a responsive WooCommerce theme like Flatsome that adapts to different screen sizes, ensuring your store looks great and functions smoothly on all devices.
- Clear about what you sell – Your homepage should instantly tell visitors what your store is about and why they should buy from you.
Leverage social media marketing
Social media is a powerful tool for promoting your products. Use:
- Instagram and Pinterest for showcasing product images and customer photos.
- Facebook and Twitter for store updates, announcements, and promotions.
- TikTok and YouTube for video content, product demos, and behind-the-scenes looks.
To automate and manage social media posts, consider plugins like Blog2Social or Revive Social, which let you schedule and share content across multiple platforms.
Use email marketing and abandoned cart recovery
Email marketing helps amp up sales and build customer loyalty. Set up automated emails for:
- Abandoned carts – Remind customers to complete their purchases using a plugin like CartFlows.
- Exclusive discounts and promotions – Reward subscribers with special offers through tools like MailPoet.
- Product updates and recommendations – Keep customers informed about new arrivals or trending items with Omnisend.

A well-crafted email campaign keeps customers engaged and brings them back to your store.
Improve SEO and create content
SEO (search engine optimization) helps your store appear in Google searches, bringing in free, organic traffic. Here’s how to improve it:
- Use an SEO plugin like Yoast SEO to spruce up product pages.
- Add a blog to share useful content related to your products (e.g., styling tips for fashion stores or gift guides for home decor).
- Use relevant keywords in product descriptions to improve search rankings.
Wrapping up
Setting up a WooCommerce store is easier than ever with the right tools and approach. From choosing a hosting provider to customizing products and promoting your brand, you now have everything you need to launch a successful online store.
The next step? Take action! Start building your store today, connect it with Printify, and bring your unique designs to life. If you’re selling custom apparel, home decor, or accessories, your online business is just a few clicks away. Ready to turn your ideas into sales? Let’s make it happen!


