


Design custom products with Printify
From DIY crafters customizing jackets to small brands adding personality to apparel, iron-on patches are an easy way to decorate, repair, and add branding to clothing.
This guide explores how to make iron-on patches, from materials and design to application and selling with Print on Demand.
Whether your goal is to make your own iron-on patch for fun or create sellable products, you’ll find practical instructions, tips, and patch options that fit what you’re looking for.
Key takeaways
- You can make iron-on patches at home using transfer paper, embroidery, or fabric paint, as long as you choose the right materials for iron-on patches and apply heat correctly.
- The best fabric for iron-on patches is smooth, heat-tolerant fabric like cotton, canvas, or denim, which helps the heat-activated adhesive bond securely and last longer.
- DIY iron-on patches require basic patch-making supplies, such as the patch fabric, fabric fuse, transfer paper, scissors, and an iron or heat press for consistent results.
- Proper application is essential if you want iron-on patches to stay. Correct temperature, firm pressure, cooling time, and garment care after applying iron-on patches are key.
- Print on Demand makes it easier to create high-quality custom patches and sell personalized patches without inventory, sewing machine setup, or manual production.
Overview of iron-on patches and how they work

Iron-on patches are decorative or functional fabric pieces that bond to a garment using heat. Each patch includes a heat-activated adhesive layer on the backing. When you apply heat and pressure with an iron or heat press, the adhesive melts and bonds to the fabric underneath.
Once cooled, the bond hardens and helps the patch stick in place through regular wear. Iron-on patches are popular because they require no advanced sewing skills, work on many garments, and allow for fast customization.
The role of heat transfer in patch adhesion
The key to iron-on patches is controlled heat. The adhesive backing is designed to activate at a specific temperature range. When heated evenly and pressed firmly, it flows into the fibers of the garment and patch fabric, creating a strong bond.
Too little heat and the patch will peel. Too much heat and you risk damaging the fabric or design.
Modern transfer paper for patches, fabric fuse layers, and heat-seal films make this process more reliable than ever, especially when paired with a heat press for consistent results.
Benefits of making your own iron-on patches

Learning how to make patches gives you the creative freedom and flexibility to experiment.
Advantages of DIY patch creation
Making DIY iron-on patches lets you:
- Customize clothing with original art.
- Repair worn garments with a decorative solution.
- Experiment with styles without committing to bulk orders.
- Have control over the materials, shape, and size.
- Create personalized patches for gifts or events.
For crafters, this process is fun and hands-on. For small business owners, it can be the starting point for selling accessories or custom apparel.
Style and branding opportunities with custom patches
Custom iron-on patches are powerful branding tools. Logos, illustrations, and slogans stand out on jackets, hats, backpacks, and uniforms.
When you create high-quality custom patches, they add texture and a premium feel to garments, making them ideal for merchandise, clubs, and fashion brands.
Essential materials for making iron-on patches

Before you start, gather the right materials. Good patch-making supplies make a noticeable difference in durability and appearance.
Recommended fabrics for patch durability
Choosing the right patch fabric is crucial. The best fabric for patches is smooth, sturdy, and heat-tolerant.
Best fabric for iron-on patches:
- Cotton.
- Canvas.
- Denim.
- Twill.
- Polyester blends designed for heat application.
Avoid very stretchy or textured fabric, as it can prevent proper adhesion. Your patch fabric should hold its shape and allow clean edges when trimmed.
Choosing the right adhesive and backing
The backing is what makes a patch iron-on. Common options include:
- Fabric fuse sheets.
- Heat-seal adhesive film.
- Transfer paper with built-in adhesive.
- Paper backing used during cutting and pressing.
Look for adhesive labeled as heat-activated and compatible with your fabric. The sticky side should face the garment during application.
Tools and supplies for designing patches
Basic patch-making supplies include:
- Scissors.
- Iron and ironing board, or heat press for best results.
- Sewing machine for finishing edges.
- Presser foot suitable for thick fabric.
- Needle and thread.
- Embroidery hoop and embroidery floss if hand embroidering.
- Transfer paper or inkjet transfer paper.
- Photo-editing program for digital designs.
- Fabric glue for temporary positioning.
Most of these materials are easy to find at craft stores or online.
How to make custom iron-on patches: Popular methods

There are several ways to make iron-on patches at home. Below are the most common methods in 2026, from simple DIY approaches to professional print-on-demand solutions with Printify.
Method 1: Make iron-on patches with transfer paper
This is one of the easiest ways to make patches for clothes at home.
Step 1: Design and print your patch
Create your patch design using a photo editing program. Keep shapes bold and lines clean. Print the design onto transfer paper using an inkjet printer.
Step 2: Prepare your fabric
Place your patch fabric flat on an ironing board. Preheat the fabric to remove moisture and wrinkles.
Step 3: Transfer the design
Position the transfer paper on the fabric, with the printed side down. Apply heat with an iron or heat press using the recommended time and temperature.
Step 4: Seal and cut your patch
Let the transfer cool, then peel away the paper. Apply fabric fuse or adhesive backing. Trim the patch to your desired shape and clean the edges.
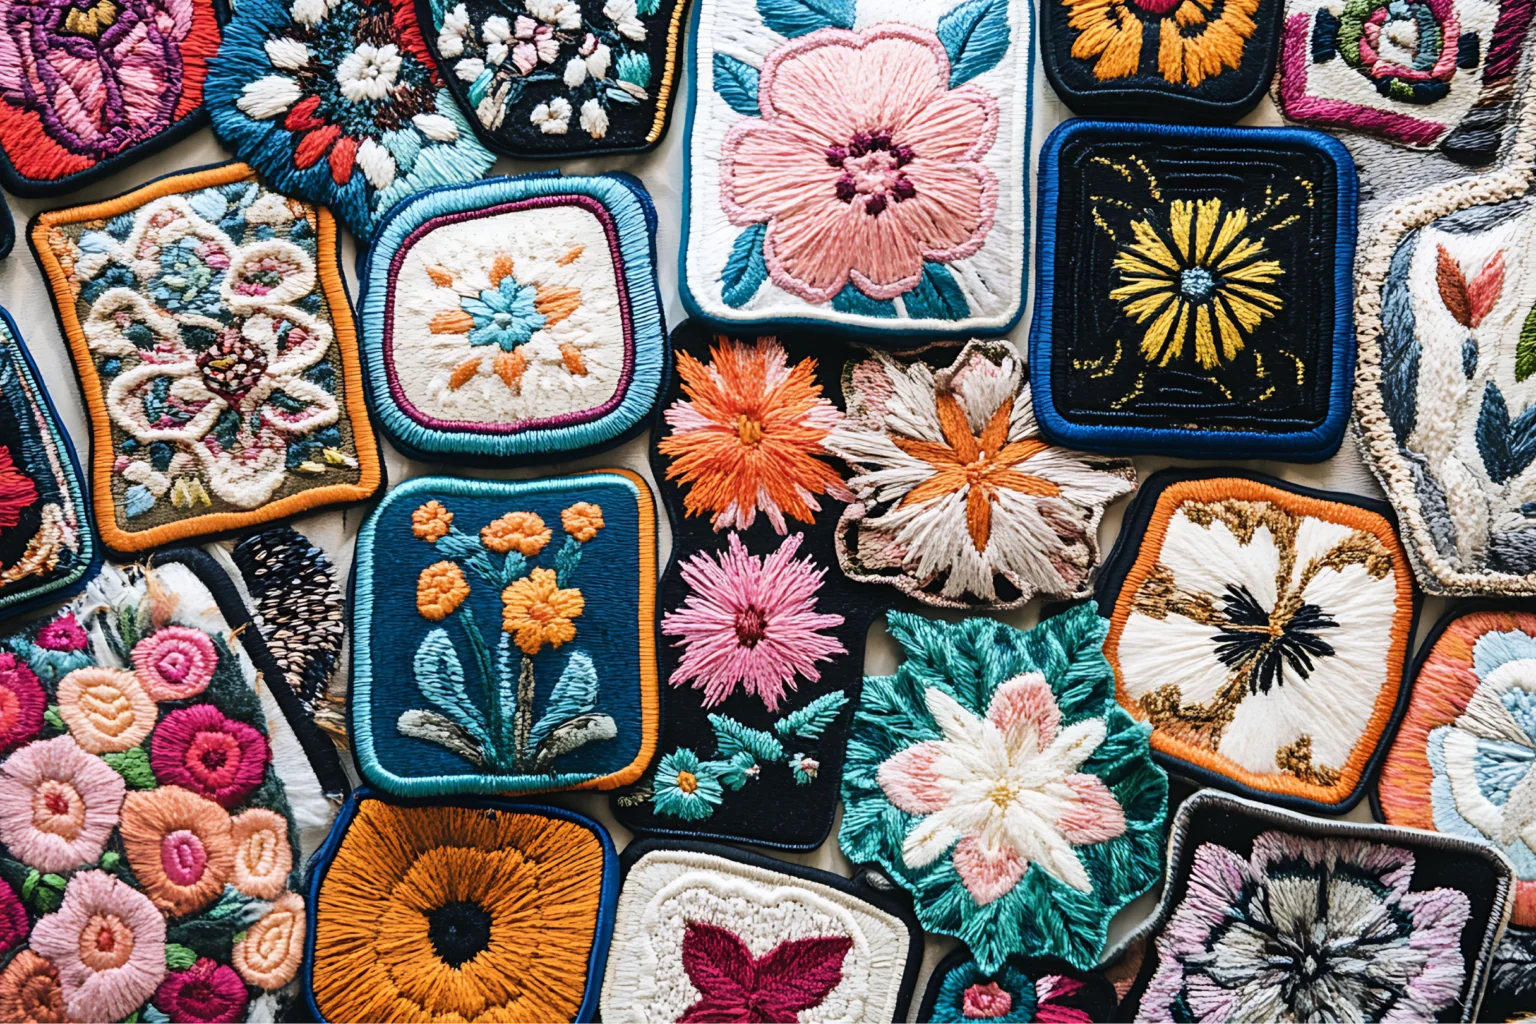
Method 2: Make embroidered iron-on patches DIY
Embroidered patches offer texture and a classic look.
Step 1: Embroider your design
Secure your patch fabric in an embroidery hoop. Use embroidery floss or embroidery thread, and machine or hand-embroidering techniques, to stitch your design.
Step 2: Add iron-on backing
Once the embroidery is complete, attach a fabric fuse or heat-seal backing to the reverse side.
Step 3: Finish and cut
Trim the patch carefully. A zigzag stitch around the edges using a sewing machine helps prevent fraying and extends the life of the patch.
Method 3: Make iron-on patches with fabric paint or markers
This method works well for artistic or one-off designs.
Step 1: Draw your design
Sketch directly onto the fabric using fabric paint or markers. Place paper underneath to prevent bleed-through.
Step 2: Set the paint or ink
Allow the design to dry completely, then heat-set it with an iron following the paint manufacturer’s instructions.
Step 3: Apply adhesive backing
Add a heat-activated adhesive layer or fabric fuse to turn your design into an iron-on patch.
Method 4: Make patches for clothes with Print on Demand
If you want consistent results or plan to sell, Print on Demand is the most scalable option.
Printify allows you to create professional iron-on patches without managing production yourself. You design once, and our Print Providers handle printing, packing, and fulfillment.
This method is ideal when you want to focus on your own design, branding, and sales strategy instead of manual patch-making. It’s also the easiest way to make iron-on patches for beginners.
Learn more about how to make custom patches on our blog or explore custom iron-on patches directly in Printify’s Catalog.
How to make sure iron-on patches stay on: Application tips

Even the best patches need proper application. Here’s what you need to know.
Preparing your fabric and patch for application
Wash and fully dry the garment before applying patches. This removes dirt and oils that interfere with adhesion. Place the patch in the desired position and check alignment.
The correct way to iron-on a patch for maximum durability
Set your iron to the temperature recommended by the adhesive, usually medium-high heat. Use firm pressure and hold the iron in place rather than sliding it.
The right temperature and pressure matter, so apply heat evenly for the recommended time. Using a pressing cloth between the iron and the patch protects the design.
Taking care of garments with iron-on patches
After application, let the patch cool completely. Wash garments inside out on cold and avoid high heat drying. With proper care, your iron-on patches will last longer.
Designing your own iron-on patch: Creativity and tools

Create unique patch designs
Good patch design focuses on bold shapes, readable lines, and clear contrast. Avoid tiny details that may fade or blur over time.
Free online tools for patch design
You can design iron-on patches using free or affordable online tools, even without advanced design skills.
Popular free tools for designing iron-on patches include:
- Canva. Useful for beginners who want to create square or custom-shaped patches using templates, icons, and text. Canva works well for simple designs, badges, and logo-style patches.
- Photopea. A browser-based photo editing program similar to Photoshop. It’s ideal for editing raster images, removing backgrounds, refining edges, and exporting print-ready files.
- GIMP. A free desktop design tool for more advanced editing. It allows precise control over layers, colors, and line thickness, which is helpful for detailed patch art.
- Inkscape. Best for vector-based patch designs. Vector files scale cleanly and are ideal for bold shapes, clean lines, and embroidered-style patches.
- Pixlr. Useful for quick image cleanup, contrast adjustment, and preparing artwork for transfer paper or inkjet transfer paper.
Once your design is ready, Printify’s Product Creator helps bridge DIY and selling. You can upload your own design, resize it, and preview how it looks on apparel and accessories like iron-on patches before listing products for sale.
This helps you check placement, scale, and overall balance, reducing mistakes before printing and fulfillment.
Making patches for yourself or to gift? Simply create a manual order.
Sell custom iron-on patches with Printify
Print on Demand simplifies selling custom patches and patch-decorated apparel.
With Printify, you can sell custom patches without inventory risk – we only print when a customer orders. With global fulfillment, consistent quality, and easy integrations with major eCommerce platforms, the whole process is seamless.
This approach is ideal if you want to turn your creative designs into a business without investing in equipment like a sewing machine or heat press upfront.
Learn more about how Printify works.
Common mistakes to avoid when making and applying patches
- Using the wrong fabric. Stretchy or heat-sensitive fabric doesn’t bond well. Choose smooth, heat-tolerant options like cotton or canvas.
- Not pre-washing the garment. Residue and shrinkage affect adhesion. Wash and dry first.
- Incorrect adhesive or backing. Not all adhesives are suitable for iron-on. Use textile-specific heat-seal products.
- Applying heat unevenly. Uneven pressure leads to peeling. Use a flat surface and a consistent press.
- Wrong temperature or ironing time. Too low and the patch will not stick. Too high and you risk damage.
- Not using a pressing cloth. Direct heat can scorch designs.
- Removing the patch film too early. Let it cool before peeling.
- Neglecting patch edges. Focus extra heat on edges or reinforce with a stitch.
- Incorrect care after application. Avoid hot washes and dryers.
- Design oversights. Test your patch design quality before applying it to a garment.
FAQ
You need patch fabric, adhesive backing or fabric fuse, scissors, iron, paper backing, and basic tools like thread and needle if sewing.
Use inkjet transfer paper, print your design, apply it with heat, and add adhesive backing.
Print a photo onto transfer paper, apply it to fabric with heat, seal it, and add iron-on adhesive.
Attach heat-activated adhesive or fabric fuse to the back of the fabric or patch.
Yes. Wash in cold water, inside out, and avoid high heat.
With proper application and care, patches can last for years.
Reheat the patch to soften the adhesive, then peel slowly and clean any residue carefully.
Conclusion
Learning how to make iron-on patches opens up tons of creative possibilities. From DIY iron-on patches at home to scalable print-on-demand solutions, there’s a method for every goal.
Start simple, choose the right materials, and apply heat carefully. Want to go beyond DIY? Explore Printify’s custom iron-on patches and turn your ideas into sellable products with no hassle.