How to Design Your Own Socks

Knowledge of print-on-demand (check); Research on sock style (check)
Now we cover how to design your own socks. This is the part that most merchants love (and skip to in these guides), the good news is that learning how to design your own socks online is fast, easy, and fun, especially with our online mock-up generator.
The first step, and the most important, is getting familiar with the design tool. While we think that it’s super user friendly, it’s always good to point out some basics.
1. Uploading Your Design
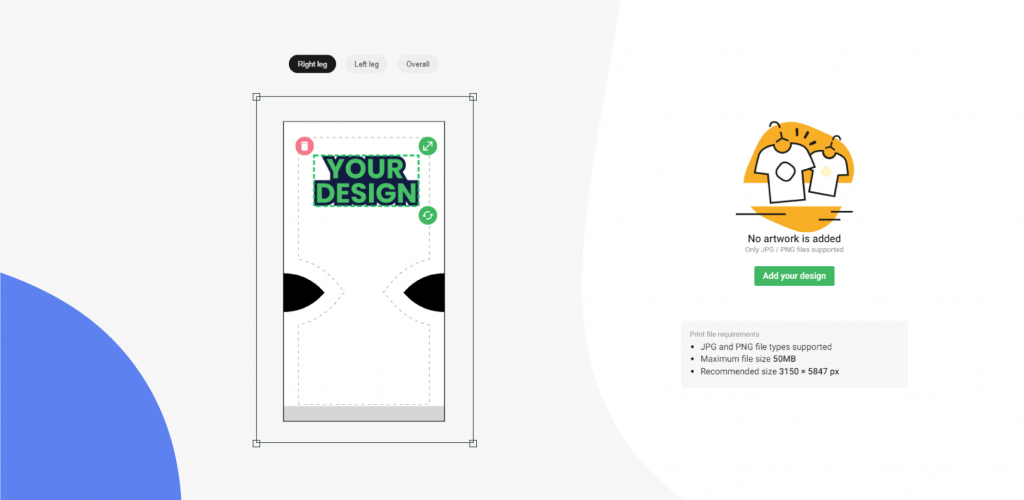
You can upload your design, pattern, photos, etc, directly from your device or computer, you can also connect your dropbox or google drive. Once you have uploaded your design you will see the printable area and also the quality of your image.
2. Image Quality & Print Area.
This is the most important step in your design process. First of all, you will see the printable area marked on the sock template. You can then resize your image with drag and drop and resize arrows. As you do this, you will see the image quality indicator on the right of the screen.
- Green = Good
- Orange = OK
- Red = Bad
This refers to the quality of the image, and how it will print on the sock. Of course, you should aim to keep the image in the green zone for the best results. Once you have your design uploaded, resized, and ready to go, you can check out how the design will look with our awesome mock-up generator.
It’s important to understand that this is a mock-up, and is designed to give you an understanding of how your designs will look in the real world. They aren’t 100% accurate, and we always advise you to order a sample of your products before sending them to customers.
To help you we have some insider tips from our print provider Tribe Socks (DTG), on how to get the best results when designing your own socks.
Printing on socks is very different from t-shirts and other garments. Here are a few things that we have found to be helpful:
++Avoid thin lines. If there is a way to thicken the lines on a provided image, that is always preferred. Often thinner lines are used to “shade” an image in a graphic. These tend not to show up on the printed sock.
++Larger images print better than smaller ones! If an image is too small, it simply will not show up – especially text. Just because something looks good on a computer screen doesn’t mean it will look good on a sock. Be sure the images are large enough to appear clear when the fabric is stretched.
++Because we are printing onto a white sock which will absorb the colored in, printing will generally mute the color from the template. Using slightly brighter, more saturated colors in the template than in the mockup will help ensure an accurate result.
These useful tips will help you when designing your own socks with Printify, they will also help you avoid problems further in your design journey, as you will avoid certain designs that could cause problems.